In the spirt of Christmas this season, we thought it would be a fun idea to do 25 posts for the 25 days of Christmas. We can't promise that it will happen but we sure can try!
Our blog has been such a great way for us to share recipes and project ideas with family and friends and it will be even more fun and special to do so during the holiday season.
Please message us with comments/ideas/recipes of your own - we love learning and trying new things!
Friday, November 30, 2012
Wednesday, November 28, 2012
wine cork board
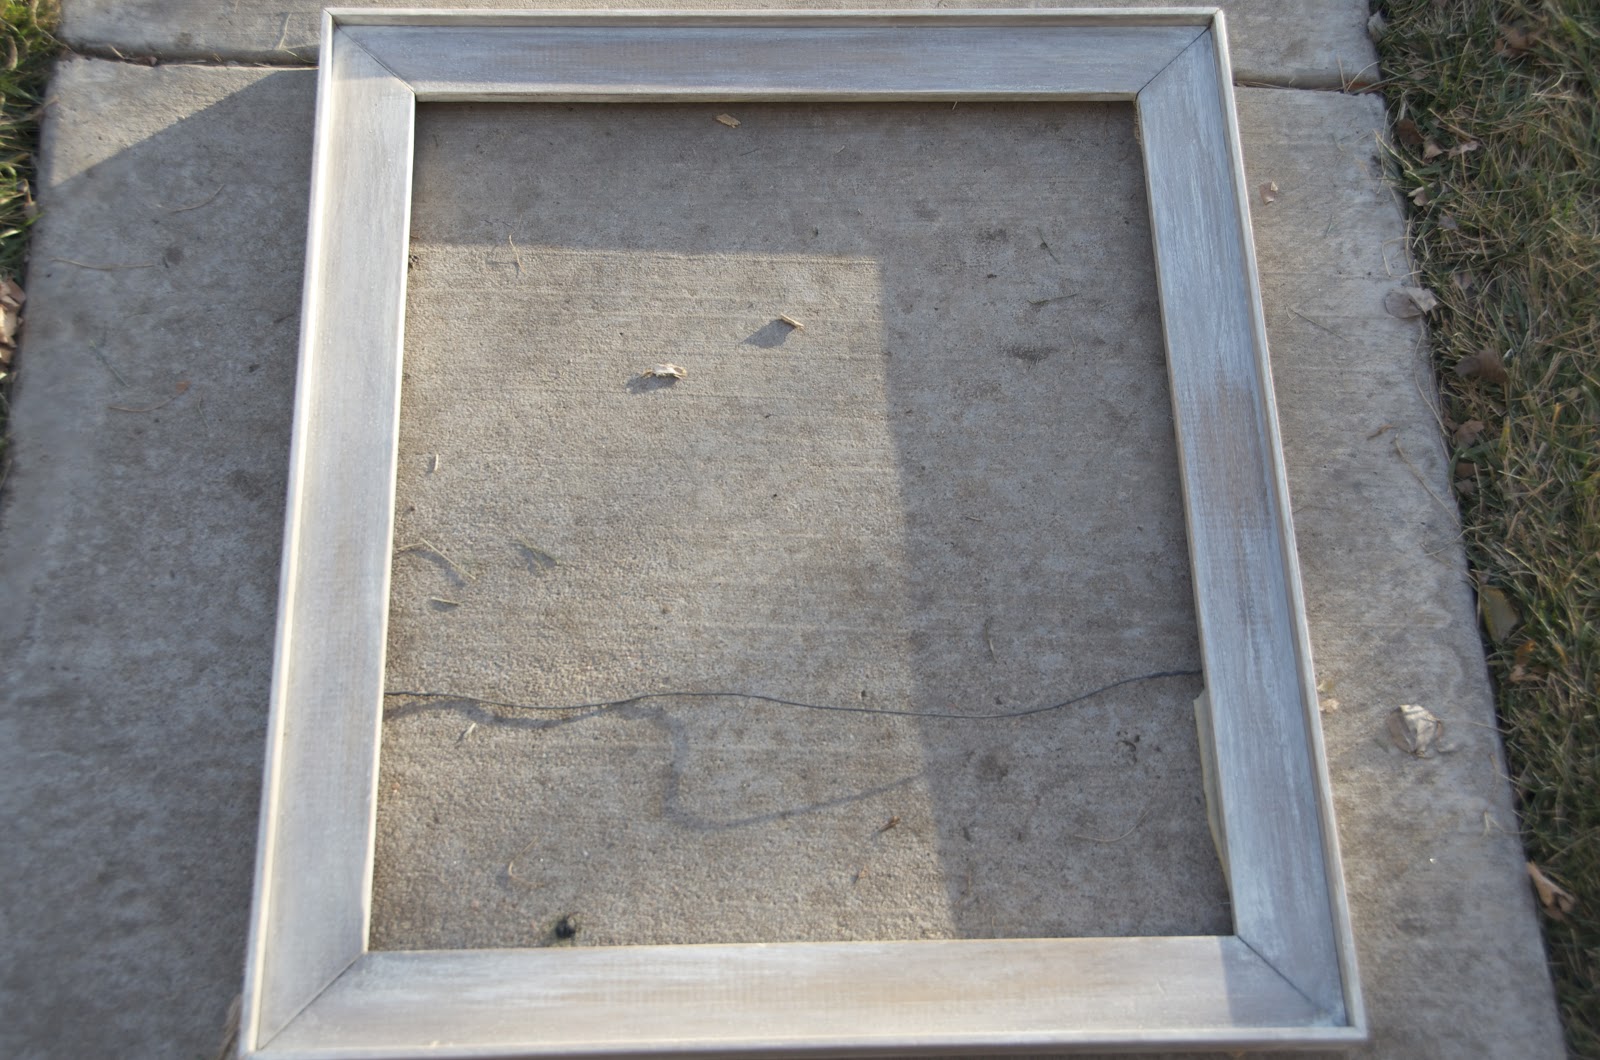
Last year, when I was decorating my (old) apartment, I was looking for an inexpensive/functional item to hang by the door. After being inspired by my Grandpa, who made trivets from old corks, I thought I would try a cork board - so I could hang reminders, pictures and recipes. Luckily I had been accumulating corks for awhile with the help of friends, family and local restaurants. I loved the board so much, that I made this one below as a gift for a friend. (Hint...great homemade Christmas gift!)
Items you will need: frame, corks (who doesn't have a ton if old corks?!), hot glue gun and a box cutter. For the frame I went to goodwill, sanded it down and then repainted it with acrylic paint from Micahel's. Or you can find a frame you like as is.


Items you will need: frame, corks (who doesn't have a ton if old corks?!), hot glue gun and a box cutter. For the frame I went to goodwill, sanded it down and then repainted it with acrylic paint from Micahel's. Or you can find a frame you like as is.
Putting together the cork board is like a puzzle. I put several corks on the board at a time and then tried to make them fit according to size. I did a standard design, but you can always be more creative.

Use the hot glue gun to glue the corks on the board

Toward the end of the cork board, you may have to cut the ends off of the corks with a box knife so they fit snugly together. Try to do this prior to gluing on the board.

And your done!

Monday, November 19, 2012
Homemade Apple Sauce
I have always wanted to make homemade apple sauce and now I am wondering why it took me so long! It is easy and delicious, and I was able to add all of my favorite spices. This is a recipe you can really tailor to your taste (add or eliminate spices, sugar etc.). The most time consuming part about the recipe is coring and peeling the apples - so if anyone has any tips or secrets I am all ears!
Ingredients:
4 pounds apples, such as McIntosh, Gala or Braeburn
1/4 cup lemon juice (2 lemons)
1/2 teaspoon ground cinnamon or 1 cinnamon stick
1/4 teaspoon nutmeg
1/4 teaspoon ginger
1/8 teaspoon cloves
3 teaspoon dark brown sugar ***

1. Peel, core and slice apples.
2. In a large pot, combine apples, lemon juice and spices in a big pot with 1 1/2 cups of water and bring to a boil. Reduce to a simmer, stirring occasionally, until apples are soft and falling apart; approximately 30 minutes.
3. Mash with potato masher until smooth with small chunks. Add sugar if using.
4. Let cool and store in an airtight container. ENJOY!
 *** What is the difference between dark and light brown sugar?
Brown sugar is refined sugar + molasses. Molasses is what gives brown sugar its rich, deeper flavor and makes it more moist. Dark brown sugar has more molasses and light brown sugar has less.
Most recipes do not specify the different type of brown sugar, but if they do it is because they are trying to achieve a specific taste or flavor in the recipe. Dark brown sugar brings more a slightly bitter molasses taste - ie Gingerbread, where as light brown sugar is more of a subtle flavor. These two sugars are generally interchangeable so use whatever you have on hand. Make sure to try both in recipes to figure out what you like best!
Ingredients:
4 pounds apples, such as McIntosh, Gala or Braeburn
1/4 cup lemon juice (2 lemons)
1/2 teaspoon ground cinnamon or 1 cinnamon stick
1/4 teaspoon nutmeg
1/4 teaspoon ginger
1/8 teaspoon cloves
3 teaspoon dark brown sugar ***

1. Peel, core and slice apples.
2. In a large pot, combine apples, lemon juice and spices in a big pot with 1 1/2 cups of water and bring to a boil. Reduce to a simmer, stirring occasionally, until apples are soft and falling apart; approximately 30 minutes.
3. Mash with potato masher until smooth with small chunks. Add sugar if using.
4. Let cool and store in an airtight container. ENJOY!

Brown sugar is refined sugar + molasses. Molasses is what gives brown sugar its rich, deeper flavor and makes it more moist. Dark brown sugar has more molasses and light brown sugar has less.
Most recipes do not specify the different type of brown sugar, but if they do it is because they are trying to achieve a specific taste or flavor in the recipe. Dark brown sugar brings more a slightly bitter molasses taste - ie Gingerbread, where as light brown sugar is more of a subtle flavor. These two sugars are generally interchangeable so use whatever you have on hand. Make sure to try both in recipes to figure out what you like best!
Saturday, November 17, 2012
Stuffed Red Peppers with Quinoa
I have been trying to eat a little healthier with the holidays approaching and found this recipe in Everyday Food: Light. Quinoa is one of my new favorite staples, described often as a nutritional powerhouse and an excellent source of protein. I have now made this dish several times and each time I like it more and more. The recipe in the book doesn't call for any meat, but I added some chicken sausage to give it added flavor and protein. The stuffed peppers pair well with brussel sprouts or other greens.


Stuffed Red Peppers with Quinoa
Serves: 4 Prep: 35 minutes: Total time: 1 hour
Ingredients:
4 red bell peppers
1 tablespoon olive oil
1 medium onion, finely chopped
2 garlic cloves
1 teaspoon ground coriander
Coarse salt and ground pepper
1 cup quinoa, rinsed
1/2 cup fresh flat-leaf parsley leaves, coarsely chopped
1/3 cup walnuts, coarsely chopped
1 cup coarsely graded provolone, mozzarella or swiss cheese ( 4 ounces)
3 spinach and garlic chicken sausages, diced
1. Preheat oven to 450 with rack in the upper third. Slice a very thin layer from the base of a bell pepper so it sits upright. Slice of the top, just below the stem and remove the ribs and seeds from top and bottom parts. Repeat with remaining peppers. Reserve bottom of peppers and dice.

2. Cook quinoa according to directions (1 cup quinoa to 2 cups of water). Meanwhile in a medium saucepan, heat oil over medium. Add onion, garlic coriander, chopped pepper tops and chicken sausage; season with salt and pepper. Cook, stirring occasionally, until onion has softened (5 min). Remove from heat.
3. Once quinoa is finished, combine with onion mixture. Stir in parsley, walnuts and 3/4 cup cheese.; season with salt and pepper.
4. Place pepper in a baking dish and divide quinoa mixture evenly among peppers. Bake for 15-20 minutes or when peppers are tender. Top evenly with remaining 1/4 cup cheese; bake until cheese melts approx. 10 minutes. Serve warm.


Friday, November 16, 2012
fall table decor - from your backyard
 We are having a pre-Thanksgiving dinner party next week and I have been trying to figure out how I am going to decorate the tables. I am ready to move on from the orange glow of Halloween and embrace the fall harvest colors of brown, copper and gold. I am trying to be practical, because as soon as Thanksgiving is over, the dozen boxes of Christmas fun will make their way up from the basement. So....I decided to take my orange pumpkins, gourds and other fall finds from the back yard (leaves, branches etc) and spray paint them with metallic paint. It took longer to gather the leaves than it did to paint all of them.
I used Rust-oleum metallic finish spray paint in copper and gold, which you can find at most hardware and "big box" stores. I am thinking about sticking the branches in my floral arrangements and the leaves and pumpkins will just be scattered on the table. Next to do: Plan the menu :)


Wednesday, November 14, 2012
Turkey Shirts - Easy Applique
 I just started day 2 of my 3 day cleanse and so far, so good! I guess I must spend a lot of my day eating or cooking/baking, because in the past 2 days, I have been able to complete some projects that have been on the back burner for months! If only my house could do a cleanse (without any participation on my part).
I saw these adorable Turkey shirts while I was searching Thanksgiving decoration ideas on Pinterest and thought they would be cute for my girls. I do not have any applique experience, so I was nervous that they would be difficult to make, but they were a cinch! In an effort to make them a little more girlie, I found these shirts (on sale) with the ruffle detail and I am really happy with how they turned out.
I think that the tutorial on the blog Artsy Fartsy Mama is easy to follow, so I will not repost.
I am including some pics of my "wild" Turkeys - Get excited for Thanksgiving!


Monday, November 12, 2012
Apple Spice Cake
I had a lapse in judgment last week and I committed to do a cleanse. It starts tomorrow. No food, no coffee, just juice for 3 days. What the heck was I thinking??! I received an email with information on how to prepare my body for its cleaning. In a nutshell, the instructions said, stick to leafy greens and stay away from meat, sugar, alcohol and other hard to digest foods. So this weekend, in preparation, I had a steak, pizza, drank a lot of coffee, a lot of wine and as my last hurrah, I made and ate this delicious Apple Spice Cake.
The cake is dense, moist and packed full of apples and fall spices. This dessert can be transported in its pan, so it is a great option for a family gathering. The recipe comes from the sono Baking Company Cookbook and I have yet to find a recipe from it that I do not like. Enjoy!
Apple Cake
 2 cups all-purpose flour
1 tsp baking soda
¾ tsp baking powder
¾ tsp coarse salt
¾ tsp cinnamon
¼ tsp nutmeg
1 1/3 cups light brown sugar
1 cup vegetable oil
2 large eggs @ room temperature
2 cups peeled, cored and grated apples (any baking apple – I used honeycrisp)
2 tsp pure vanilla extract
2/3 cup toasted walnuts, chopped (optional)
Brown Sugar Buttercream
2 large egg whites
½ cup brownsugar
Pinch of coarse salt
¾ cup (1 ½ sticks) of unsalted, firm butter
½ tsp of pure vanilla extract
1. Preheat oven to 350 degrees. Spray an 8x8 pan with nonstick cooking spray. Line a baking sheet with parchment paper or a nonstick silicone baking mat.
2. In a medium bowl, sift together the flour, baking soda, baking powder, salt, cinnamon and nutmeg; set aside
3. In a large bowl, whisk together the brown sugar, oil, eggs, grated apples and vanilla. Add the dry ingredients and fold with a rubber spatula until the flower has been absorbed. Fold in walnuts if using.
4. Pour the batter into the prepared cake pan. Bake on the prepared baking sheet, rotating the sheet about two-thirds of the way through the baking time, until a tester inserted into the center of the cake comes out with just a few crumbs adhering to the bottom, 50 to 55 minutes. Let cool completely in the pan on a wire rack.
5. To make the buttercream: Bring 1 inch of water to a boil in the bottom of a double boiler. In the top of the boiler, whisk the egg whites with the brown sugar and the salt over (not in) the simmering water until warm to the touch, 1 to 2 minutes. (Be careful not to let the bottom of the top of the double boiler touch the water.) Transfer to the bowl of a standing mixer fitted with the whisk attachment and beat until stiff peaks form. With the machine running, gradually beat in the butter, piece by piece. By the time all of the butter is added, the mixture will break, but it will become smooth again as your continue to beat. Beat in vanilla.
6. Spread buttercream over the top of the cake. Cut into squares.
Thursday, November 8, 2012
Roasted Garlic & Citrus Chicken
 We had our first snow fall yesterday and it reaffirmed the fact that I am not ready for winter! I protested, by staying in my workout clothes, not showering and drinking 3 mugs of hot cocoa. I wanted to make something warm for dinner, but still being in my bad weather slump, I wanted to expend minimal energy/effort.
I had seen Rachel Ray make this in 10 minutes on her show and as it turns out it was not Hollywood trickery. The prep really only took l0 minutes (with the exception of roasting the garlic). The whole family loved this meal. In fact, I received so much praise, that I am no longer in my bad weather mood (for now :)).
Ingredients (Recipe from Rachael Ray)
4 bulbs garlic, ends cut to expose cloves
Extra virgin olive oil (EVOO), for liberal drizzling
Salt and pepper
1/2 cup white wine
1 1/2 cups chicken stock
3-4 tablespoons chopped fresh herbs of choice (I prefer rosemary and thyme)
2 tablespoons butter
Juice of 1 lemon
8 pieces bone-in, skin-on chicken, such as 2 thighs, 2 drummers and 4 breasts
Crusty bread, to soak up juices
Serves 4-6
Preparation
Pre-heat the oven to 375ºF.
Drizzle the garlic with EVOO, season with salt and pepper and wrap tightly in a foil pouch. Roast until light golden and just tender. Let cool to handle, then press the cloves into a bowl and mash with a knife.
Drizzle the garlic with EVOO, season with salt and pepper and wrap tightly in a foil pouch. Roast until light golden and just tender. Let cool to handle, then press the cloves into a bowl and mash with a knife.
Heat the vermouth and stock; whisk in the roasted garlic paste and herbs. Finish the sauce with butter and lemon juice.
Drizzle the chicken with EVOO and season with salt and pepper. Roast the chicken for 15 minutes, then pour the sauce over and roast for 20 minutes more.
Place crusty bread in the bottom of a shallow bowl. Scoop some of the garlic/lemon broth onto the bread (enough to saturate the bread - 1/4 cup). Place the desired amount of chicken on top of the bread and top with a little more sauce and some arugula salad (I just took Arugula, olive oil, salt and the juice of one lemon and tossed it together for a peppery, tangy salad)


Tuesday, November 6, 2012
Roasted Shrimp with Spaghetti Squash
I know... not another squash recipe!! But after a couple of LONG days at work, and eating takeout and frozen pizza for dinner, I was craving something fresh and light. I found this recipe in one of my favorite and newly discovered cookbooks, Everyday Food: Light and it hit the spot. I had been curious and skeptical about using squash in lieu of pasta, but after tasting this dish, I have become a believer.
Spaghetti Squash is a winter squash that is low in calories (42 calories/cup) and is packed with nutrients such as folic acid, potassium, Vitamin A and beta carotene. Spaghetti squash is harvested in early fall, but can be stored in cool dry places for up to a month.
This recipe is light and delicious and to add a little extra flavor and crunch I added bacon which ended up being a great idea (when is bacon not a good idea?) This recipe is best served with bread or a green salad.
Prep: 10 min, Total Time: 60 min, Servings: 4
INGREDIENTS:
1 medium spaghetti squash
Coarse salt and ground pepper
1 pound large shrimp, peeled and deveined
3-4 slices bacon
1 tablespoon plus 1 teaspoon olive oil
1 tablespoon fresh lemon juice (1 lemon), plus lemon wedges for serving
2 tablespoons fresh parsley, chopped
1. Preheat oven to 375. Cut ends off of squash and cut in half lengthwise. Do not scoop out seeds yet. Season with salt and pepper and place face side down in a 9 x 13 inch baking dish. Add 3/4 cup water to dish and bake for 45 minutes or until tender when pierced by knife. Let cool.
 2. While the squash is roasting, toss shrimp with 1 teaspoon olive oil and salt and pepper and bake on a rimmed baking sheet. Roast until cooked through - about 10 minutes.
3. Cook bacon according until crispy. Chop bacon into small pieces.
4. Scoop out the seeds of the squash and discard *. With a fork, scrape flesh into a large bowl. Add shrimp and any cooking juices, bacon, lemon juice, 1 tablespoon olive oil and toss to combine. Season with salt and pepper, top with parsley and serve with lemon wedge.

Monday, November 5, 2012
Butternut Squash Lasagna with Marinara
The last Farmers' Market of the season was this weekend, which is yet another reminder that winter is coming. I am doing my best to embrace the impending season full of snow and COLD, by thinking about the positive aspects of winter, like the the Packers, old fashions, wood burning fires, skiing, snuggling and more old fashions. Spending time in the kitchen is another thing that gets me through the long Wisco winters and this Butternut Squash Lasagna, is a dish that will warm your spirit and tummy! The recipe is from Cooking Light, which makes it virtually guilt free (unless you have multiple old fashions while eating it). I did make a few small changes, so I will re post the recipe below.

Ingredients
2 tablespoons olive oil
2 cloves of garlic crushed and diced
10 cups fresh spinach
3/4 cup (3 ounces) shredded sharp provolone cheese
1/2 cup chopped fresh flat-leaf parsley
1 tablespoon salt
1/2 teaspoon freshly ground black pepper
2 large eggs
1 (15-ounce) carton part-skim ricotta cheese
1 (15-ounce) carton fat-free ricotta cheese
5 cups butternut squash, peeled and cut into 1-inch chunks
12 oven-ready lasagna noodles (such as Barilla)
1 cup (4 ounces) grated fresh Parmesan cheese
Preparation
- Preheat oven to 375°.
- Heat a large Dutch oven coated with olive oil over medium-high heat. Add onion and garlic; sauté 4 minutes or until tender. Add spinach; sauté 1 1/2 minutes or until spinach wilts. Combine provolone, parsley, salt, pepper, eggs, and ricotta cheeses in a large bowl.
- Place squash in a microwave-safe bowl. Cover and cook on high 5-8 minutes or until tender.
- Coat the bottom and sides of 2 (8-inch-square) baking dishes with cooking spray. Spread 1/2 cup Marinara in the bottom of one prepared dish. Arrange 2 noodles over sauce; spread 1 cup cheese mixture over noodles. Arrange 1 1/2 cups squash over cheese mixture; spread 3/4 cup sauce over squash.
- Arrange 2 noodles over sauce; spread 1 cup cheese mixture over the noodles. Arrange 1 1/2 cups onion mixture over cheese mixture; spread 3/4 cup sauce over spinach mixture.
- Arrange 2 noodles over sauce; spread 1 cup Marinara evenly over noodles. Sprinkle with 1/2 cup Parmesan. Repeat procedure with remaining ingredients in remaining pan. Cover each pan with foil.
- Bake at 375° for 30 minutes. Uncover and bake an additional 30 minutes.
- To freeze unbaked lasagna: Prepare through Step 6. Cover with plastic wrap, pressing to remove as much air as possible. Wrap with heavy-duty foil. Store in freezer for up to 2 months.
- To prepare frozen unbaked lasagna: Thaw completely in refrigerator (about 24 hours). Preheat oven to 375º. Remove foil; reserve foil. Remove plastic wrap; discard wrap. Cover lasagna with reserved foil; bake at 375º for 1 hour. Uncover and bake an additional 30 minutes or until bubbly.


Subscribe to:
Posts (Atom)