Wednesday, October 29, 2014

Pumpkin Dream Cake

I pinned this on pinterest a while ago, hoping that I would have an occasion to make it, and thankfully Bridget made that happen :)  We had a baby shower for her last weekend to celebrate the mom-to-be and baby boy due this winter!  It was great to see family and friends and the weather couldn't have been nicer.

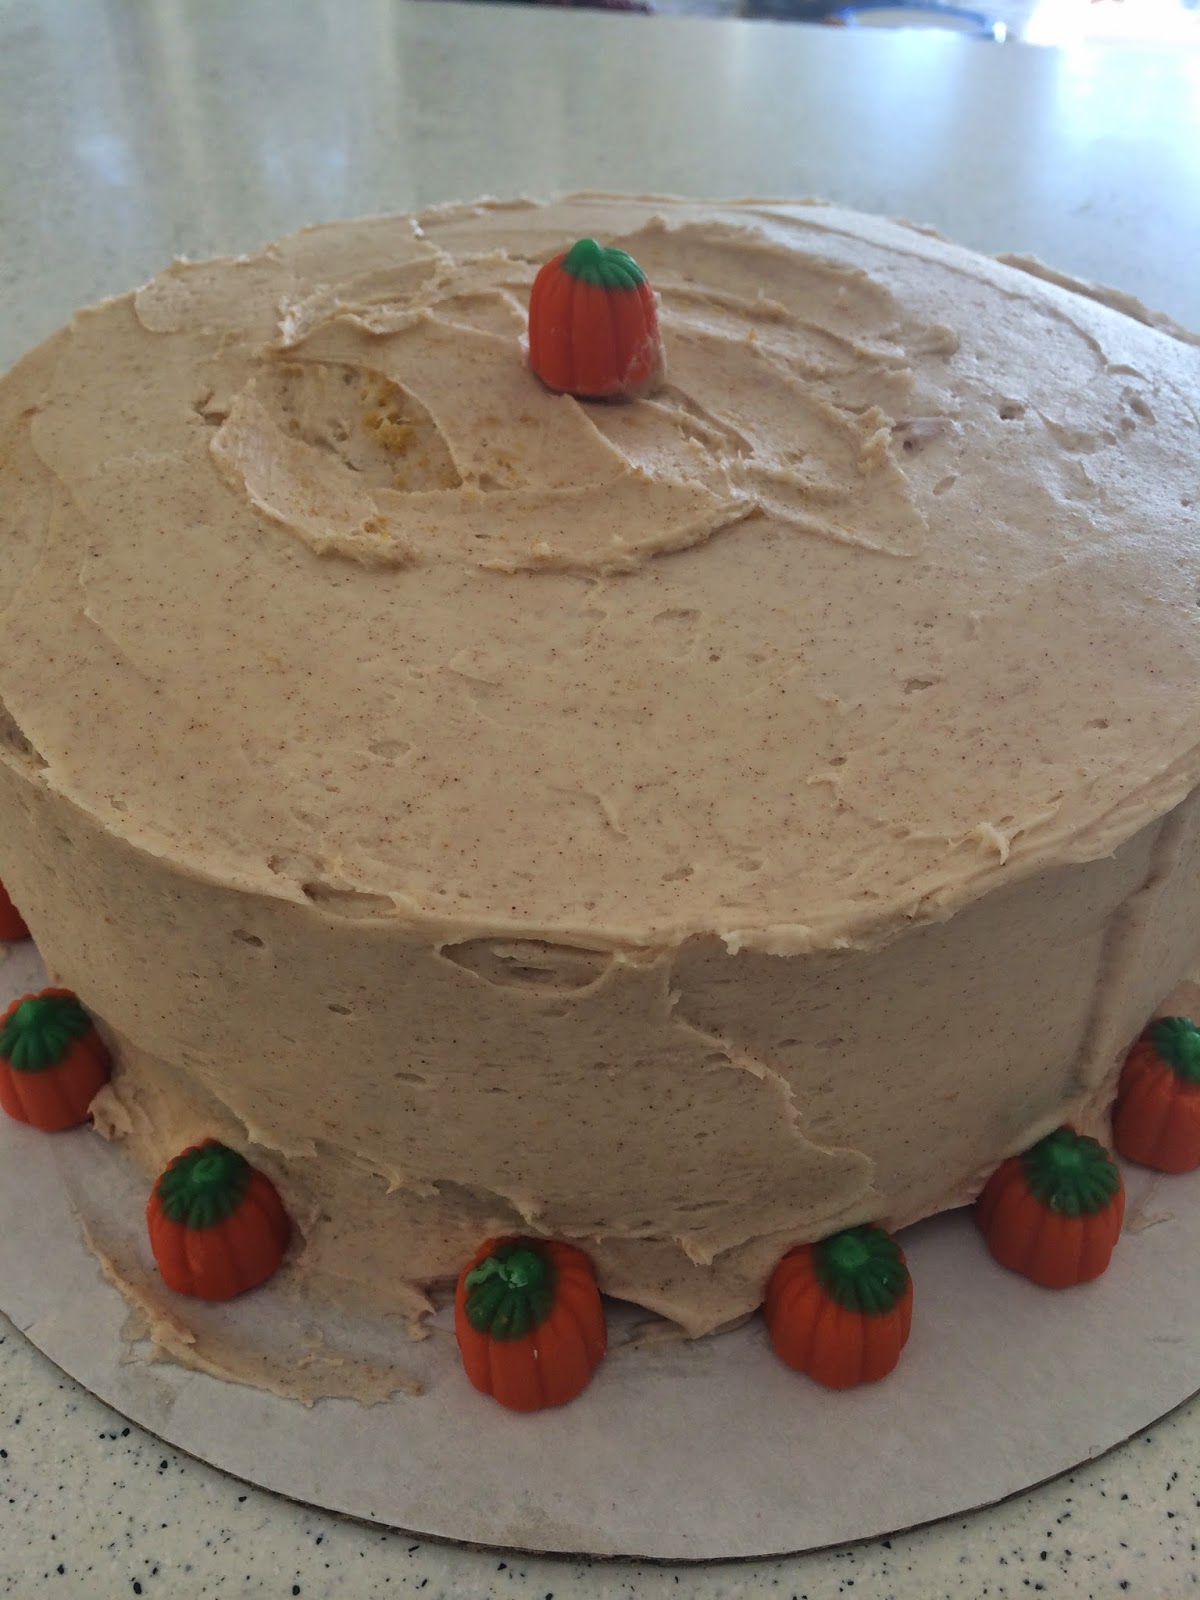
We went with a pumpkin theme for the shower, so the cake was the PERFECT dessert.

The Dream Cake is not hard to make and it is exceptionally delicious (IT HAS MAPLE CREAM CHEESE FROSTING - HOW CAN IT GET ANY BETTER?!) It would be the perfect dessert to bring to a Thanksgiving feast or serve at a fall soiree!


Pumpkin Dream Cake with Maple Cream Cheese Frosting - The Novice Chef

Ingredients
3 cups all-purpose flour
1 1/2 teaspoons baking soda
1/2 teaspoon salt
3/4 cup unsalted butter, softened
2 cups granulated sugar
3 large eggs
1 tablespoon vanilla extract
1 (15 oz) can pumpkin
1/4 cup vegetable oil
1 cup milk

12 oz (1 1/2 packages) cream cheese, softened
3/4 cup unsalted butter, softened
3 tablespoons pure maple syrup
2 teaspoons vanilla extract
2 teaspoons cinnamon
6 cups powdered sugar
directions:


Preheat oven to 300°F. Grease 3, 8-inch round cake pans (I used two 9-in Pans). Set aside.

In a medium bowl, mix flour, baking soda and salt. Set aside.

In a large bowl/stand mixer, cream butter and sugar until light and fluffy. Beat in the eggs one at a time, then stir in vanilla, pumpkin and vegetable oil. Beat in the flour mixture alternately with the milk.

Divide batter evenly into prepared pans. Bake for 35-40 minutes, or until a toothpick inserted into the center of the cake comes out clean. Remove pans from oven and immediately place in freezer for 45 minutes. (This keeps the cake moist by immediately stopping the baking so the cake does not continue to bake when you remove it form the oven.)

For the frosting: In a large bowl, cream butter and cream cheese until smooth. Beat in maple syrup, vanilla and cinnamon. Add confectioners' sugar and beat on low speed until combined, then on high until frosting is smooth.

Assemble the 3 layers with a thick layer of frosting in between each layer. Then apply a thin crumb coat on the top and sides. Pop back in the freezer to harden the crumb coat for about 10 minutes.

Apply one final thick and even layer around the outside of the cake. Store in the fridge until ready to serve.


Wednesday, October 22, 2014

Pumpkin No Bake Energy Bites

These bites are awesome. My kids eat them for dessert and they are a healthy, energy packed snack for me.  I cannot get enough of pumpkin this time of year and these little nuggets do the trick.


Pumpkin No Bake Energy Bites - Gimmesomeoven.com

8 oz. (about 1 packed cup) chopped dates
1/4 cup honey
1/4 cup pumpkin puree
1 Tbsp. chia seeds or flax seeds
1 tsp. ground cinnamon
1/2 tsp. ground ginger
1/4 tsp. ground nutmeg
pinch of salt
1 cup old-fashioned oats (dry, not cooked)
1 cup toasted coconut flakes
1 cup toasted pepitas (pumpkin seeds)

Combine the dates, honey, pumpkin puree, chia (or flax) seeds, cinnamon, ginger, nutmeg and salt in a food processor, and pulse until smooth and combined.

Transfer the mixture to a large bowl, and stir in the oats, coconut flakes and pepitas until evenly combined. Cover and refrigerate for at least 30 minutes.

Once the mixture is cool (and easier to work with), use a spoon or cookie scoop to shape it into your desired size of energy balls. (Mine were about 1-inch in diameter.) Alternately, you can line a small baking pan with parchment paper, and press the mixture evenly into the pan, let it cool, and then cut into bars.

Store covered in the refrigerator (I actually put mine in the freezer) for up to 2 weeks. 


Monday, October 13, 2014

Crock Pot Balsamic Pork Roast

Thank goodness for the crock pot!  There is nothing better than coming home after a long day (or just after a day at home with the kiddos) and having a hot, delicious smelling dinner ready to eat.  This is the second time that I have made this pork and it is moist, tangy and it tastes amazing.  I would be willing to bet that you have all of the ingredients in your pantry, so this should be a no-brainer addition to your dinner menu this week. 

Crock Pot Balsamic Pork Roast
Skinnytaste.com

Ingredients:
2 pound boneless pork shoulder roast (sirloin roast)
kosher salt, to taste
1/2 tsp garlic powder
½ teaspoon red pepper flakes
1/3 cup chicken or vegetable broth
1/3 cup balsamic vinegar
1 tablespoon Worcestershire sauce
1 tablespoon honey

Season the pork with salt, garlic powder and red pepper flakes and place it into the slow cooker. Mix together the broth and vinegar and pour it over the pork, then pour the honey over and set the timer for 4 hours on High or 6-8 hours on Low.

Once the pork is cooked and tender (it should shred easily with a fork), remove from slow cooker with tongs into a serving dish. Break apart lightly with two forks and put back into the slow cooker and ladle 1/2 cup sauce over the pork and keep warm until ready to eat.

Wednesday, October 8, 2014

Cauliflower Mashed Potatoes

Chris and I have been thoroughly enjoying hearty fall treats and it is only the beginning of October.
Because of this, I wanted to try and start the week off right, by making a healthier side for dinner. I saw mashed cauliflower offered as a side at a local restaurant and thought it would be a perfect substitute for mashed potatoes.
The mashed cauliflower tasted VERY similar to mashed potatoes and I don't feel as bad after eating a VERY large helping!


Ingredients:

1 head of cauliflower, cut into small pieces 
1/2 teaspoon minced garlic
1 tablespoon cream cheese
1/4 cup parmesan
1/2 teaspoon salt
1/4 teaspoon ground pepper


 Cook cauliflower in a pot of bowling water until tender, approximately 8 minutes. Drain cauliflower. While still warm pat dry in-between paper towel. With an immersion blender or a food processor, mix cauliflower, garlic cream cheese, parmesan, salt and pepper until almost smooth. Garnish with chives and butter. 

Tuesday, October 7, 2014

Butternut Squash Muffins

SQUASH! We cannot get enough.  My kids love it, I love it and thankfully it is in abundance this time of year.  I saw this recipe for butternut squash muffins and made them yesterday afternoon.  By 6pm the muffins were gone and then we all ate butternut squash pasta :)  

Butternut Squash Muffins
1 cup mashed roasted butternut squash
1 cup flour
1/2 cup whole wheat flour (optional, can use 1.5 cups all purpose flour)
2 and 1/2 teaspoons baking powder
1/2 cup white sugar
1/4 teaspoon salt
2 teaspoons pumpkin pie spice
1 tbls melted butter
3/4 cup milk
1 egg

First roast your butternut squash. Pre-heat the oven to 350. Cut your squash in half the long way, coat with a bit of olive oil and place in a pan. Roast for about 30-40 minutes until it is nice and soft. Let it cool for a bit, then scrape the insides into a bowl. 

Preheat the oven to 400.  Whisk together the dry ingredients.  Beat the egg, then stir in the milk, butter, and roasted butternut squash.  Add the wet ingredients to the dry ingredients and DON’T MIX TOO MUCH (will make your muffins heavy and they are already pretty heavy), just until they are combined
Pour into greased or papered 12-muffin pan (I used paper but I think greasing would have been better for these muffins – if you do use paper make sure the paper coordinates with your blog’s logo)
Bake for 20 minutes. These muffins will look done on the top, but may need a minute or two more to bake, you want them fully cooked on the inside since they are sort of rich and heavy. If you take them out too early they will be a bit rubbery (though still yummy).
Let them cool completely before eating.


Friday, October 3, 2014

Winter Minestrone

It is officially FALL and I am trying to embrace every second of it.  We have been outside every chance we can get, enjoying the colors, the crisp air and most especially the fact that we do not have to rake the lawn quite yet.   

A friend of mine made me this hearty soup and it was so delicious that I made it it again the next week.  My whole family loves it and it is not only filling but low fat and super tasty.  


Winter Minestrone - Recipe by Ina Garten

Ingredients
Good olive oil
4 ounces pancetta, 1/2-inch-diced
1 1/2 cups chopped yellow onions
2 cups (1/2-inch-diced) carrots (3 carrots)
2 cups (1/2-inch-diced) celery (3 stalks)
2 1/2 cups (1/2-inch-diced) peeled butternut squash
1 1/2 tablespoons minced garlic (4 cloves)
2 teaspoons chopped fresh thyme leaves
1 (26-ounce) can or box diced tomatoes, such as Pomi
6 to 8 cups chicken stock, preferably homemade
1 bay leaf
Kosher salt and freshly ground black pepper
1 (15-ounce) can cannellini beans, drained and rinsed
2 cups cooked small pasta, such as tubetti
8 to 10 ounces fresh baby spinach leaves
1/2 cup good dry white wine
2 tablespoons store-bought pesto
Freshly grated Parmesan cheese, for serving

Directions
Heat 2 tablespoons of olive oil over medium heat in a large, heavy pot or Dutch oven. Add the pancetta and cook over medium-low heat for 6 to 8 minutes, stirring occasionally, until lightly browned. Add the onions, carrots, celery, squash, garlic, and thyme and cook over medium heat, stirring occasionally, for 8 to 10 minutes, until the vegetables begin to soften. Add the tomatoes, 6 cups of the chicken stock, the bay leaf, 1 tablespoon salt, and 1 1/2 teaspoons pepper to the pot. Bring to a boil, then lower the heat and simmer uncovered for 30 minutes, until the vegetables are tender. Discard the bay leaf. Add the beans and cooked pasta and heat through. The soup should be quite thick but if it's too thick, I add more chicken stock.

Just before serving, reheat the soup, add the spinach, and toss with 2 big spoons (like tossing a salad). Cook just until the leaves are wilted. Stir in the white wine and pesto. Depending on the saltiness of the chicken stock, add another teaspoon or two of salt to taste. Serve large shallow bowls of soup with a bruschetta on top. Sprinkled with Parmesan cheese, drizzle with olive oil and serve hot.