Tuesday, May 29, 2012

Strawberries and Creme Cake

Strawberries are in season - Hooray!!!  I made this delicious Strawberries and Cream Cake this weekend and it was a hit. This was my first time making whipped cream and it was very fresh and creamy tasting.  I will never buy it from the store again  :) 

Strawberries & Cream Cake

Recipe for Strawberries & Cream Cake
1/2 cup unsalted butter (1 stick)
1 1/2 cups all-purpose flour
2 tsp baking powder
1/2 tsp salt
1 cup sugar
2 large eggs plus 2 large yolks
1/2 tsp vanilla extract
1/2 cup whole milk
1 lb strawberries, hulled and thinly sliced
1 tsp unflavored gelatin
1 1/2 cups heavy cream
(note: my dad said to add in 1/2 tsp of vanilla to the whipped cream mixture. I will try this next time)
  1. Preheat oven to 350 degrees. Place parchment paper on the bottom of two 8-inch round cake pans and butter and flour the paper and sides.  In a medium bowl, whisk together flour, baking powder and salt. Set aside.
  2. Using an electric mixer on high speed, beat butter and 1/2 cup sugar, until light and fluffy. Add eggs and yolks one at a time, and beat well after each addition.  Beat in vanilla.  With mixer on low, add in flour mixture and alternate with milk (1/3 flour, milk, flour, milk, flour). Mix until just combined and pour half of the batter in each cake pan. Bake until toothpick comes out clean, about 25-30 minutes. Cool in the pan for about 10 minutes and then invert onto a wire rack to cool completely.
  3. In a large bowl, combine strawberries and 1/4 cup sugar. Set aside. Place 2 tablespoons cold water in a small saucepan, and sprinkle with gelatin; let soften 5 minutes.  Place saucepan over very low heat and stir until gelatin is dissolved. Remove from heat; let cool.
  4. Using an electric mixer (with whisk attachment), beat cream and remaining 1/4 cups sugar until very soft peaks form.  Continue to beat, and gradually add gelatin mixture; beat until soft peaks form.  
  5. Place one of the cake pieces on a serving plate or cake stand, flat side up. Arrange 1/2 of the strawberries over the cake and top with 1/2 of whipped cream, leaving a 1-inch border.  Cover with the other cake flat side up.  Top cake with remaining cream, leaving a 1-inch border.  Refrigerate cake at least 1 hour (or up to a day).  Just before serving, spoon strawberries over cake.  


Kohlrabi & Apple Salad

Summer Farmers' Market Series

I went to Madison's North Side Farmers' Market this Sunday and left with some fresh strawberries, sugar snap peas and a 3 huge kohlrabi.  Kohl..what??  Kohlrabi belongs to the cabbage family and is native to Northern Europe. It means green turnip in German.

Kohlrabi is an excellent source of vitamin C and potassium. It also contains good quantities of vitamin B6, folic acid, magnesium and copper. The vegetable not only improves circulation, it also helps stabilize blood sugar levels and alleviate health conditions such as hypoglycemia and diabetes. Finally, Kohlrabi is low in calories and high in fiber, which makes it an excellent food to eat if you are trying to lose weight (1 cup is only 36 calories!!).

I searched online for some Kohlrabi recipes and ended up combiningg a few of them to come up with the salad below.

Salad
3 kohlrabi, peeled and julienned
2 apples, julienned
1/2 small red onion, shredded
1/3 cup raisins
1/3 cup chopped pecans
Kosher salt and pepper to taste

Dressing
1/4 cup olive oil
2-3 Tbs apple cider vinegar
2 Tbs sugar
2 Tbs grainy Mustard
1/2 tsp coriander
salt and pepper to taste

Combine all salad ingredients in a bowl (you can use your food processor/shredder to slice kohlrabi and apples if you want it to be more of a slaw).   In another bowl, whisk ingredients together for the dressing. Taste for seasoning and dress salad generously with dressing. Mix well and serve.

Here are more Kohlrabi recipes that I thought would be worth trying;

1. Roasted Kohlrabi
2. Kohlrabi Home Fries

Monday, May 28, 2012

5 minute Hummus

The best thing about this hummus recipe is that the ingredients are staples that are always in my cupboard. Mrs. Lucas first introduced me to the recipe last summer and it has been a favorite ever since.  I love that I know what is going into the hummus and that I can make it at the drop of a hat, without a trip to the store. This is a basic recipe, so you can get more creative by adding peppers or other spices.

1 can garbanzo beans, drained and rinsed
1 clove garlic
1/2 tsp Kosher salt
2 Tablespoons lemon juice
1/8 teaspoon Cumin
1/8 teaspoon cayenne pepper
1/8 cup olive oil
1 Tablespoon fresh or dried parsley

- Combine all ingredients (except parsley) in food processor and blend.
- With processor running add 1/8 cup hot water. Blend until smooth.
- Add parsley and pulse for 10 second

Happy Memorial Day!

Thursday, May 24, 2012

Throw Pillows

After spending an amazing weekend at home with family and friends I needed something to distract me and keep me busy this week. I was lucky enough to spend a long weekend celebrating a college graduation, engagement, first home, and most importantly family and friends. Not only did I love all of the above reasons as an excuse to visit, but I also just LOVE being home.  The lake, my childhood home, the memories and of course the constant chaos.  Upon returning back to Denver and not feeling the comfort that I was engulfed in over the weekend, I decided there was a need to make my apartment feel a little more "homey".

Every room in my parents house is warm, relaxing and of course filled with a million pillows. There are new pillow cases for every season and at least 5-8 pillows on each bed. I may tease my mother about her plethora of pillows, but in reality I love them and envy her.  So, finding my "mother in me" I decided to take the sewing machine out of the box (which had not been open since the 7th grade) and begin a project! 

I had to start from start from square one and learn how to thread my sewing machine :)  I decided to make throw pillows for our spare bedroom. I watched youtube videos and also found an amazing blog to help me learn step-by-step, how to make pillows (see link to the blog below). I found great fabric at JoAnn Fabrics and finished four pillows in one day! One quick tip - most Androids and iPhones have apps for Michaels and JoAnns - so never pay full price for anything.

The blog that I used was Design Sponge - Enjoy!

Monday, May 21, 2012

Sunday Scone Day!! Cheddar Chive Scones & Almond Cherry Scones

Cheddar Chive Scones:

Living in Denver I have yet to find something that is as good as the cheddar-jalapeno cheese bread from the Madison Farmers' Market. However, this savory scone comes pretty darn close and they are a nice departure from most other scone recipes that I have made.

Prep time: 10 minutes + 1 hour refrigerated
Baking: 20 minutes

2 cups all-purpose flour
1 tablespoon baking powder
1 teaspoon course salt
1/4 cup finely chopped fresh chives
1 cup finely grated extra-sharp cheddar cheese, plus one for sprinkling
1 1/4 cups heavy cream, chilled

1. In a large bowl, whisk flour, baking powders, salt and chives. Stir in cheese with a fork.
2. Add 1 cup of the cream and fold with a rubber scraper (or hands) until the cream has been completely absorbed. Continue adding cream, 1 tablespoon at a time, just until dough comes together.
3. Turn dough out on a heavily floured work surface and pat to a 3 by 10 inch rectangle, about 1 inch thick. Using a bench scraper cut into eight equal triangles. Place on prepared baking sheet and refrigerate for about 1 hour or until firm.
4. Preheat oven to 400 degrees. Brush scones with remaining 1/4 cup cream and sprinkle with grated cheese. Bake, rotating baking sheet about 2/3rds of the way through, until the scones are golden brown and puffed - approximately 16-20 min. Transfer scones to a wire rack to cool.
5. A small taste of wisconsin - Bridget!


Almond Cherry Scones

Our familiy is obsessed with anything almond flavored, so I decided to change our standard scone recipe to include our fav flav.

3 cups all purpose flour
1/2 cup granulated sugar
1 1/2 Tbs baking powder
1 1/2 tsp coarse salt
2 tsp almond extract
1 1/2 dried cherries
1/2 cup slivered almonds (optional)
1 2/3 cups heavy cream, chilled, plus 1/4 cup for brushing
2 to 3 Tbs sanding sugar, for finishing

1. Line baking sheets with silicone baking mat, or parchment paper
2. In a large bowl, mix together flour, sugar, baking powder, salt and almond extract. Stir in cherries.
3. Add 1 1/2 cups cream and fold witha rubber scraper or your hands, until the cream has been absorbed. continue adding cream by the tablespoon, until there are not any dry patches.
4. Pat dough into a 6x11 inch rectangle (about 1 inch thick). Cut scones into triangles using a pastry scraper, or round circles using a glass or cookie cutter. Refrigerate until firm (about an hour)
5. Preheat oven to 400 degrees
6. Brush scones with remaining cream and sprinkle with sanding sugar. Bake for 16 to 20 minutes, or until scones spring back when touched. Cool baking sheets on a wire rack for 10 minutes and then using a spatula, transfer scones to a wire rack to cool.

Enjoy! - Jenny

Saturday, May 19, 2012

Roasted Beets & Goat Cheese Salad


Summer Farmers' Market Series

I am going to try to do a weekly post that showcases an item that I purchased at the Madison Farmers' Market and I am going to kick it off with beets.
Beets are a summer super food!  Rich in dietary fiber, vitamin C, magnesium, iron, copper and phosphorus, 
beets have been found to reduce cholesterol, triglycerides, and the risk of stroke.  Beets are also known to prevent birth defects, certain cancers, cataract and respiratory problems.  The root vegetable stimulates liver function and boosts energy levels too.  So, even if you don't like beets, eat them anyway.

Roasted Beets Salad with Goat Cheese
(serves 4)

Roasted Beets
4 Medium Beets
Olive Oil
Sea Salt
Pepper

Dressing
2 Tbs red wine vinegar
3 Tbs olive oil
1 Tbs diced shallots
2 Tbs fresh orange juice

Salad
10 oz mixed greens
1/2 cups toasted & chopped walnuts
6 oz soft goat cheese
* I usually add chicken to make it an entree salad.

1. Preheat oven to 375 degrees. Wash beets and remove greens. Tear 4, 8 inch pieces of tin foil. Place a beet on each piece of foil and lightly coat beets with olive oil. Sprinkle beets with sea salt and pepper. Wrap the tin foil around each beet and place on a cookie sheet. Roast in the oven until beets are cooked through, approximately 45-60 minutes. Let the beets cool and then take a butter knife and scrape off outer skin. Slice and set aside.

2. While the beets are roasting, whisk together shallot, vinegar, orange juice and oil. Season with salt and pepper. Set dressing aside.

3. Place walnuts in a shallow dish and with your hands form goat cheese into 12 equal balls. Roll balls in walnuts, turning to coat completely, then flatten into discs.

 4. Place greens into a large bowl, and drizzle with dressing. Divide among plates and add sliced beets, goat cheese discs and grilled chicken if desired.


Monday, May 14, 2012

Turkey Enchiladas

A couple of years ago, my good friend Anne introduced me to an amazing and healthy Enchilada recipe.  I am continually adding new ingredients and tweaking the recipe and they always turn out muy delicioso! It has become a staple amoung family and friends and is a great caserole dish for a big group of people or just two :)

Ingredients:
1 pack ground turkey (1.5lbs)
Taco seasoning
1 small jar of salsa (suggest pace picante chunky salsa - mild)
1 cup frozen corn - partially thawed
1 small can diced jalapenos
1/2 red pepper
16 oz low fat sour cream
1 can cream of chicken soup - fat free
1 can Enchilada sauce (green)
1 + cup mexican shredded cheese
8-12 tortillas (whole wheat)

- Cook ground turkey + taco seasoning over medium heat. When turkey meat is browned, mix in frozen corn, diced jalapenos, red pepper and salsa with prepared taco meat. Pour 1/2 can enchilada sauce in the bottom of a 9 x 13 inch baking pan.

- Fill a tortilla with taco mixture and roll tortilla, lining them side by side in baking dish. There is usually enough filling to make 8-12 tortillas depending on the size of tortilla using.
- Mix 8 oz sour cream with 1/2 to whole can of cream of chicken soup. Spread on top of tortillas. Pour remaining amount of enchilada sauce on top

- Sprinkle desired amount of cheese on top and bake on 400 for approximately 45 minutes. Let sit for 5-10 minutes before serving.


These are great the day you make them and also for left overs. I have frozen them as well in 1-serving size containers and reheated for meals at work and they still taste fabuloso!

Decoupage Tray

My mom's birthday and mother's day are both right around the corner, and I usually try to give her something homemade along with her other loot. Bridget inspired me to try some decoupage with her coaster post, so I decided to get crafty with Mod Podge.
I found a white melamine tray at target and I thought it would be fun to add some Lilly Pultizer fabric, to go with the placemats we bought for her mother's day gift (my mom has a slight obsession with the iconic palm beach patterns). 
I wasn't sure how well the fabric would affix to the plastic tray, but it turned out great. Here is how I did it.

1. Cut a piece of fabric to fit into the bottom of the tray. This was by far the hardest part, because the tray had rounded edges and it was hard to cut the fabric to fit perfectly. Next time I will trace the bottom of the tray onto cardboard and use it as a template to cut out the fabric.

2. Using a sponge brush, apply a thin coat of Mod Podge to the bottom of the tray and place fabric on top. Try to smooth out the fabric to remove any bubbles/wrinkles. Let this dry for at least an hour.

3. Using the sponge brush, apply a coat of Mod Podge over fabric and let dry (at least an hour or so), repeat 4-5 times.

4. Finish the tray by spraying the fabric with an acrylic coating (3 coats, letting dry in between coats). This will keep the fabric waterproof. 

* Clean tray after using with a damp cloth. I would not submerge in water or place in dishwasher.


Tuesday, May 8, 2012

Rhubarb Galore

I went to the farmers' market this morning with my sister Heidi, for the sole purpose of buying some tart and tangy rhubarb. I left with over 3 lbs and I then spent the afternoon trying to decide what to make.
I ended up choosing 3 different recipes; Rhubarb Custard Pie, Strawberry Rhubarb Crisp and Rhubarb Waffles with Rhubarb Sauce. YUM! Although, I may have over done it with my rhubarb consumption this weekend.

Rhubarb Custard Pie (Our Favorite Recipes)
3 cups rhubarb, cut
1 cup sugar
2 Tbs flour
1/2 cup cream
2 eggs
1/4 tsp salt
1 tsp vanilla

Mix rhubarb with 1/2 cup sugar and flour. Put into an unbaked pie crust. Mix together 2 beaten eggs, 1/2 cup sugar, salt, cream and vanilla. Pour over rhubarb. Cover with top crust and bake 15 minutes at 450 degrees and then 30 minutes at 350 degrees. Serve with ice cream

Strawberry Rhubarb Crisp  (The Sono Baking Company Cookbook)
Streusel Topping
1/2 cup all-purpose flour
1/2 cup firmly packed light brown sugar
1/4 tsp course salt
1/2 cup unsalted butter, cut into 1/4 inch cubes
3 Tbs old fashioned rolled oats

Fruit
1 1/4 pounds rhubarb, cut into 1 inch pieces (about 1 1/2 cups)
1 pint strawberries, stemmed, and then halved or quartered depending on size
1/2 cup granulated sugar
2 Tbs corn starch
Juice of 1 lemon
Grated zest of 1/2 orange
1/4 tsp coarse salt

Preheat Oven to 375 degrees. Butter an 8 inch baking dish and set on a baking sheet lined with a non-stick silicone baking mat.
To make streusel topping: in a medium bowl use a fork to stir together the flour, sugar,s alt and cinnamon.  Add the butter and using your fingertips, quickly work it into the dry ingredients until pea-sized crumbs.  Add oats and toss.  Set aside in the refrigerator. 
In a medium bowl, toss together the fruit, sugar, cornstarch, lemon juice, orange zest and salt. Transfer to prepared baking dish, and sprinkle streusel mixture over the top. 
Bake rotating the baking sheet about 2/3 of the way through the cooking, until the juices bubble up and the topping is golden brown, 40-45 minutes.  Serve warm or at room temperature with ice cream.


Rhubarb Waffles with Rhubarb/Strawberry Sauce
Sauce
1 pound rhubarb, trimmed and diced (1/4 in thick), about 2 1/2 cups
1/2 pint strawberries, sliced in half or quarters, depending on their size
1 cup sugar

Waffles
1 stick melted unsalted butter
2 1/4 cups all purpose flour
1 tsp baking soda
1 1/2 tsp baking powder
1/2 tsp cinnamon
1/2 tsp salt
3 large eggs separated
2 cups buttermilk 1 tsp pure vanilla extract

To prepare sauce: Combine fruit and sugar in a medium saucepan and bring to a simmer over medium-low heat. Cook until the rhubarb is tender and translucent. Transfer about 3/4 cup of the rhubarb to a small bowl with a slotted spoon and reserve for the waffle batter. Boil the remaining rhubarb in syrup over medium heat stirring occasionally, until slightly thickened, 5 to 7 minutes.

Waffles - In a large bowl sift together dry ingredients. In a separate bowl, whisk together egg yolks, buttermilk, melted butter, rhubarb syrup and vanilla (make sure all ingredients are at room temperature, or else the will  not combine well). Pour into dry mixture and combine. 

 In a medium bowl, beat egg whites until stiff but not dry. Fold whites into batter.  Ladle about 1/3 cup batter onto each section of the waffle grid, close lid and bake for 3 to 5 minutes, or until no steam emerges from waffle maker.

Use rhubarb sauce as you would syrup. I have been using left over syrup in my oatmeal :)

Sunday, May 6, 2012

Pom Poms

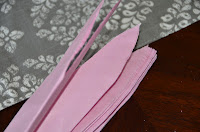
Easiest party decoration ever! For any type of party these pom poms are fun, inexpensive and super easy to make. They take less than 10 minutes a piece and can really spice up a room. They are also great to use as gift bows, napkin rings and anything else you can think of! I found this how-to from Marthastewart.com, where she has a how-to video as well.

You will need 8 to 10 sheets of tissue paper - size can vary depending on how large you are attempting to make them. I used the 20" x 20" for the light pink and 16" x 20 " for the hot pink.  If you are hanging them you will want fishing wire, but if you are using them as napkin rings or for bows you can use pipe cleaners or floral wire.

- Start by stacking the tissue paper. Make 1 to 1-1/2 inch accordion folds, creasing with each fold.

- Take the folded stack by the middle and wrap the fishing wire around it. Make sure you piece is long enough so you can hang form ceiling.

- With scissors, trim ends of tissue paper in round or pointy shapes. I found both to be fun and it was great to have different shapes.

- Separate layers, pulling one piece of tissue paper at a time. Continue to shape as desired!

These added so much at the party and also worked later as bows for a shower gift.


French Almond Macarons

Recently I have been seeing French Macaroons everywhere and I have been dying to make them.  The Bachelorette party I hosted gave me the perfect opportunity to try them.  I ended up doing a test run prior to the party since it was my first time making them and I'm glad I did. They were not difficult and were a huge hit at the party!

Cookies
1 1/4 cups confectioners sugar
1 1/2 cups sliced almonds, finely ground with a food processor
3 Large egg whites
Pinch of salt
1/4 cup granulated sugar
1/4 teaspoon pure vanilla extract

1. Sift confectioners' sugar. Whisk in ground almonds. Line two baking sheets with parchment paper or silicone baking mats. Mark circles on the mats using a 1 1/2 inch cutter dipped in flour or the rim of a small glass (ie: champagne flute)

2. Beat egg whites using whisk attachment on electronic mixer on medium speed until foamy. Add salt. Beat in sugar, 1 teaspoon at a time until medium-soft peaks form. Transfer to a large bowl.

3. Fold 1/2 of the almond mixture into the egg mixture using a spatula until just incorporated.  Fold in vanilla extract and remainder to almond mixture. Add food coloring at this time if you are using. Firmly tap bottom of bowl on the counter to eliminate air pockets.

4. Transfer mixture into a pastry bag fitted with 1/2-inch plain tip and pipe into marked circles.  Pipe straight down on to the paper. Bake for 20-25 minutes rotating half way through


Frosting
4 large egg whites
1 1/4 cup sugar
1 1/2 cups unsalted butter (softened, cut into tablespoons
2 1/2 teaspoons pure vanilla extract

1.  Put egg whites and sugar in a heatproof bowl of an electric mixer set over a pan of simmering water. Whisking constantly, cook until sugar has dissolved and mixture is warm (approximately 5 minutes).

2. Attach bowl to mixer, using the whisk attachment beat egg white mixture on high until it forms stiff, but not dry peaks. Continue beating until fluffy and cooled about 6 minutes.

3. Switch to paddle attachment and mix on medium-low, adding the butter several tablespoons at a time, beating well after each addition. Beat in vanilla. Reduce speed to low, beat 2 minutes to eliminate air bubbles. Stir until smooth with rubber spatula.

Put approximately 1-2 teaspoons frosting on cookie and place other cookie on top!

    Favorite Granola

    Granola is one of those things that I love eating, but tend to stay away from, because of the high sugar/calorie content in store bought brands. Over the past few months, I have started to make my own so I could control the amount of sugar and also experiment with different fruits, nuts, grains and other yummy add-ins. Here are my 2 favorite recipes;

    Fruity Granola
    4 cups old fashioned oats
    1/2 cup coarsely chopped almonds
    1/2 cup coarsely chopped pecans
    1/4 cup dried apricots
    1/4 cup golden raisins
    1/2 cup dried cherries
    1/2 cup unsweetened coconut
    1/2 tsp cinnamon
    1/3 cup honey
    1/3 cup canola oil
    1/3 cup light brown sugar
    1 tsp almond or vanilla extract

    Directions
    Preheat oven to 325 degrees.  Combine oats, nuts, fruit, and cinnamon in a large bowl. Bring honey, oil and sugar to a boil and remove from heat. Add in vanilla/almond extract and stir until combined. Pour liquid mixture over oats etc and toss with a wooden spoon.

    Spread granola onto a rimmed baking sheet and spread evenly. Bake stirring occasionally, until golden (about 25 minutes).  Remove from the oven and let the granola cool completely. Store in an airtight container


    Wheaty Granola (S. Chow's recipe)
    6 cups old fashioned oats
    1 cup wheat bran
    1 cup wheat germ
    1 cup wheat flour
    1 cup dry milk
    1 cup coconut
    1 cup pecans
    1 cup oil (canola, vegetable)
    1 cup honey

    Directions
    Preheat oven to 325 degrees. Mix all dry ingredients in a large bowl. Using a wooden spoon, stir the mixture, while pouring in the oil and honey. Once mixed, spread granola onto a rimmed baking sheet and bake for about 35 minutes, stirring every 10 minutes.   Remove from the oven and let the granola cool completely. Store in an airtight container.