Wednesday, October 29, 2014

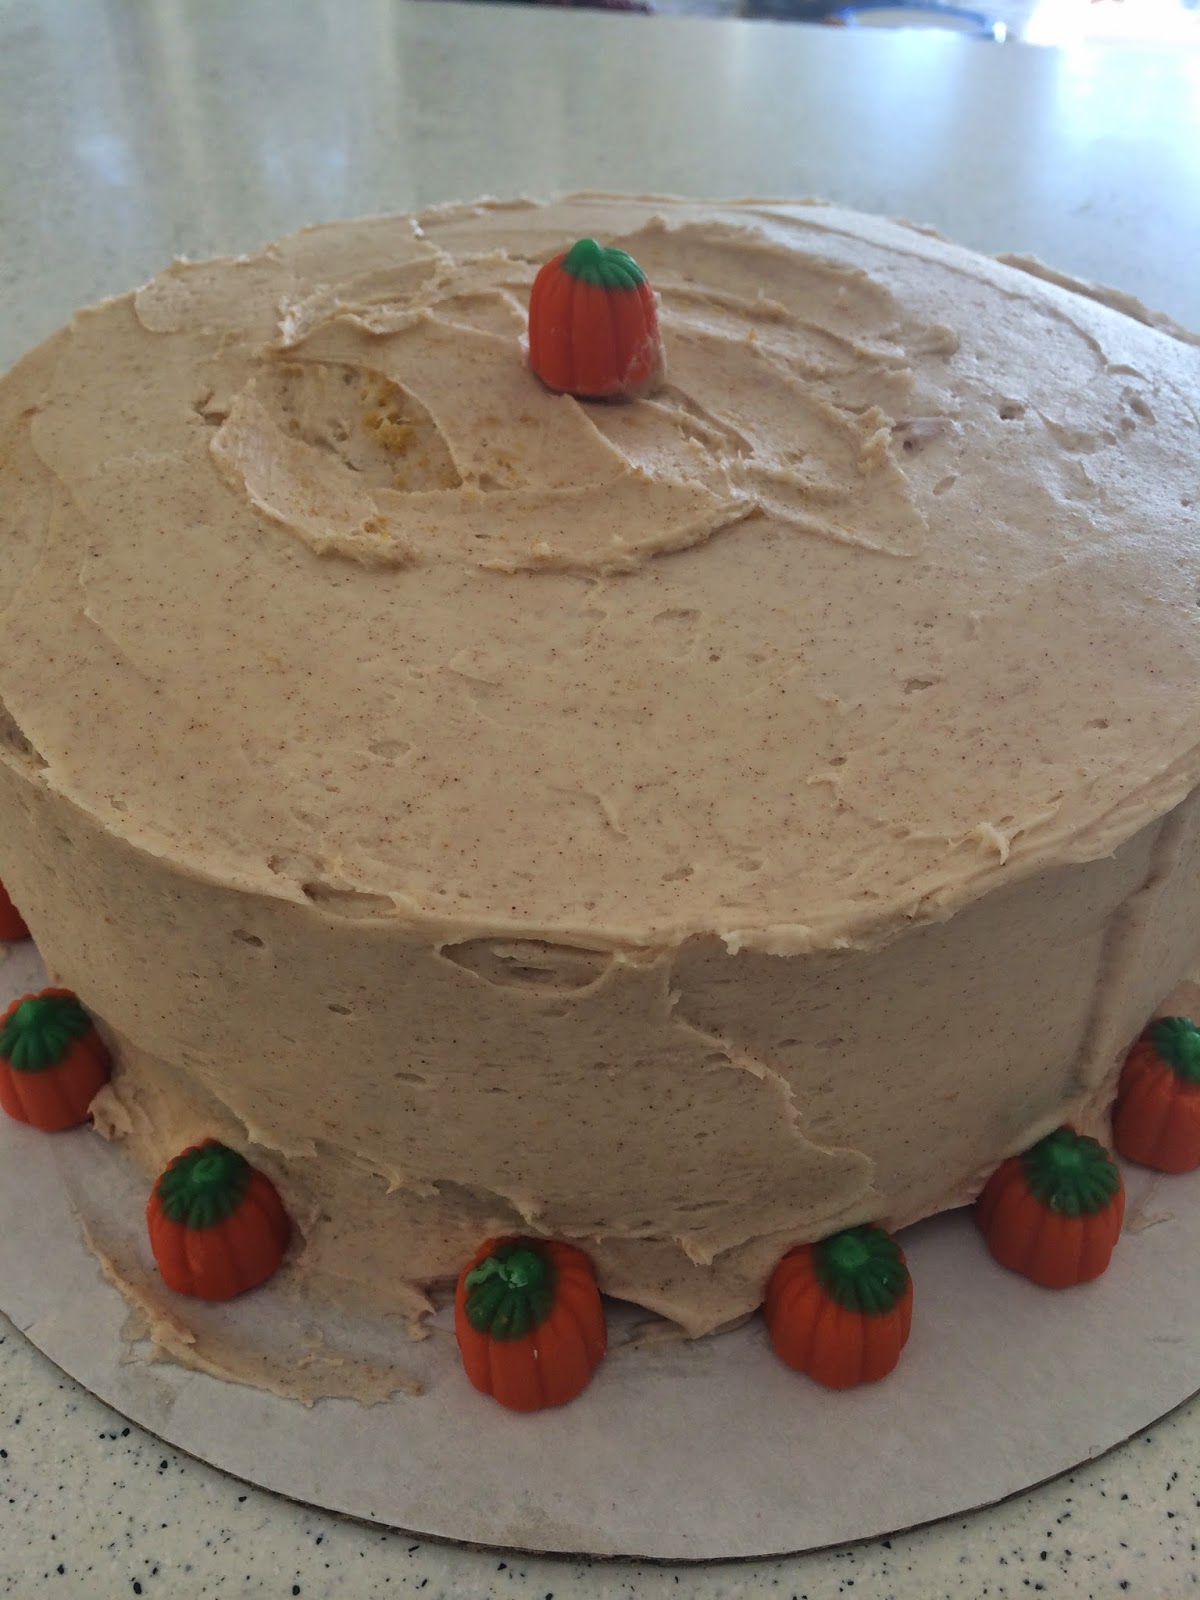
Pumpkin Dream Cake

I pinned this on pinterest a while ago, hoping that I would have an occasion to make it, and thankfully Bridget made that happen :)  We had a baby shower for her last weekend to celebrate the mom-to-be and baby boy due this winter!  It was great to see family and friends and the weather couldn't have been nicer.

We went with a pumpkin theme for the shower, so the cake was the PERFECT dessert.

The Dream Cake is not hard to make and it is exceptionally delicious (IT HAS MAPLE CREAM CHEESE FROSTING - HOW CAN IT GET ANY BETTER?!) It would be the perfect dessert to bring to a Thanksgiving feast or serve at a fall soiree!


Pumpkin Dream Cake with Maple Cream Cheese Frosting - The Novice Chef

Ingredients
3 cups all-purpose flour
1 1/2 teaspoons baking soda
1/2 teaspoon salt
3/4 cup unsalted butter, softened
2 cups granulated sugar
3 large eggs
1 tablespoon vanilla extract
1 (15 oz) can pumpkin
1/4 cup vegetable oil
1 cup milk

12 oz (1 1/2 packages) cream cheese, softened
3/4 cup unsalted butter, softened
3 tablespoons pure maple syrup
2 teaspoons vanilla extract
2 teaspoons cinnamon
6 cups powdered sugar
directions:


Preheat oven to 300°F. Grease 3, 8-inch round cake pans (I used two 9-in Pans). Set aside.

In a medium bowl, mix flour, baking soda and salt. Set aside.

In a large bowl/stand mixer, cream butter and sugar until light and fluffy. Beat in the eggs one at a time, then stir in vanilla, pumpkin and vegetable oil. Beat in the flour mixture alternately with the milk.

Divide batter evenly into prepared pans. Bake for 35-40 minutes, or until a toothpick inserted into the center of the cake comes out clean. Remove pans from oven and immediately place in freezer for 45 minutes. (This keeps the cake moist by immediately stopping the baking so the cake does not continue to bake when you remove it form the oven.)

For the frosting: In a large bowl, cream butter and cream cheese until smooth. Beat in maple syrup, vanilla and cinnamon. Add confectioners' sugar and beat on low speed until combined, then on high until frosting is smooth.

Assemble the 3 layers with a thick layer of frosting in between each layer. Then apply a thin crumb coat on the top and sides. Pop back in the freezer to harden the crumb coat for about 10 minutes.

Apply one final thick and even layer around the outside of the cake. Store in the fridge until ready to serve.


Wednesday, October 22, 2014

Pumpkin No Bake Energy Bites

These bites are awesome. My kids eat them for dessert and they are a healthy, energy packed snack for me.  I cannot get enough of pumpkin this time of year and these little nuggets do the trick.


Pumpkin No Bake Energy Bites - Gimmesomeoven.com

8 oz. (about 1 packed cup) chopped dates
1/4 cup honey
1/4 cup pumpkin puree
1 Tbsp. chia seeds or flax seeds
1 tsp. ground cinnamon
1/2 tsp. ground ginger
1/4 tsp. ground nutmeg
pinch of salt
1 cup old-fashioned oats (dry, not cooked)
1 cup toasted coconut flakes
1 cup toasted pepitas (pumpkin seeds)

Combine the dates, honey, pumpkin puree, chia (or flax) seeds, cinnamon, ginger, nutmeg and salt in a food processor, and pulse until smooth and combined.

Transfer the mixture to a large bowl, and stir in the oats, coconut flakes and pepitas until evenly combined. Cover and refrigerate for at least 30 minutes.

Once the mixture is cool (and easier to work with), use a spoon or cookie scoop to shape it into your desired size of energy balls. (Mine were about 1-inch in diameter.) Alternately, you can line a small baking pan with parchment paper, and press the mixture evenly into the pan, let it cool, and then cut into bars.

Store covered in the refrigerator (I actually put mine in the freezer) for up to 2 weeks. 


Monday, October 13, 2014

Crock Pot Balsamic Pork Roast

Thank goodness for the crock pot!  There is nothing better than coming home after a long day (or just after a day at home with the kiddos) and having a hot, delicious smelling dinner ready to eat.  This is the second time that I have made this pork and it is moist, tangy and it tastes amazing.  I would be willing to bet that you have all of the ingredients in your pantry, so this should be a no-brainer addition to your dinner menu this week. 

Crock Pot Balsamic Pork Roast
Skinnytaste.com

Ingredients:
2 pound boneless pork shoulder roast (sirloin roast)
kosher salt, to taste
1/2 tsp garlic powder
½ teaspoon red pepper flakes
1/3 cup chicken or vegetable broth
1/3 cup balsamic vinegar
1 tablespoon Worcestershire sauce
1 tablespoon honey

Season the pork with salt, garlic powder and red pepper flakes and place it into the slow cooker. Mix together the broth and vinegar and pour it over the pork, then pour the honey over and set the timer for 4 hours on High or 6-8 hours on Low.

Once the pork is cooked and tender (it should shred easily with a fork), remove from slow cooker with tongs into a serving dish. Break apart lightly with two forks and put back into the slow cooker and ladle 1/2 cup sauce over the pork and keep warm until ready to eat.

Wednesday, October 8, 2014

Cauliflower Mashed Potatoes

Chris and I have been thoroughly enjoying hearty fall treats and it is only the beginning of October.
Because of this, I wanted to try and start the week off right, by making a healthier side for dinner. I saw mashed cauliflower offered as a side at a local restaurant and thought it would be a perfect substitute for mashed potatoes.
The mashed cauliflower tasted VERY similar to mashed potatoes and I don't feel as bad after eating a VERY large helping!


Ingredients:

1 head of cauliflower, cut into small pieces 
1/2 teaspoon minced garlic
1 tablespoon cream cheese
1/4 cup parmesan
1/2 teaspoon salt
1/4 teaspoon ground pepper


 Cook cauliflower in a pot of bowling water until tender, approximately 8 minutes. Drain cauliflower. While still warm pat dry in-between paper towel. With an immersion blender or a food processor, mix cauliflower, garlic cream cheese, parmesan, salt and pepper until almost smooth. Garnish with chives and butter. 

Tuesday, October 7, 2014

Butternut Squash Muffins

SQUASH! We cannot get enough.  My kids love it, I love it and thankfully it is in abundance this time of year.  I saw this recipe for butternut squash muffins and made them yesterday afternoon.  By 6pm the muffins were gone and then we all ate butternut squash pasta :)  

Butternut Squash Muffins
1 cup mashed roasted butternut squash
1 cup flour
1/2 cup whole wheat flour (optional, can use 1.5 cups all purpose flour)
2 and 1/2 teaspoons baking powder
1/2 cup white sugar
1/4 teaspoon salt
2 teaspoons pumpkin pie spice
1 tbls melted butter
3/4 cup milk
1 egg

First roast your butternut squash. Pre-heat the oven to 350. Cut your squash in half the long way, coat with a bit of olive oil and place in a pan. Roast for about 30-40 minutes until it is nice and soft. Let it cool for a bit, then scrape the insides into a bowl. 

Preheat the oven to 400.  Whisk together the dry ingredients.  Beat the egg, then stir in the milk, butter, and roasted butternut squash.  Add the wet ingredients to the dry ingredients and DON’T MIX TOO MUCH (will make your muffins heavy and they are already pretty heavy), just until they are combined
Pour into greased or papered 12-muffin pan (I used paper but I think greasing would have been better for these muffins – if you do use paper make sure the paper coordinates with your blog’s logo)
Bake for 20 minutes. These muffins will look done on the top, but may need a minute or two more to bake, you want them fully cooked on the inside since they are sort of rich and heavy. If you take them out too early they will be a bit rubbery (though still yummy).
Let them cool completely before eating.


Friday, October 3, 2014

Winter Minestrone

It is officially FALL and I am trying to embrace every second of it.  We have been outside every chance we can get, enjoying the colors, the crisp air and most especially the fact that we do not have to rake the lawn quite yet.   

A friend of mine made me this hearty soup and it was so delicious that I made it it again the next week.  My whole family loves it and it is not only filling but low fat and super tasty.  


Winter Minestrone - Recipe by Ina Garten

Ingredients
Good olive oil
4 ounces pancetta, 1/2-inch-diced
1 1/2 cups chopped yellow onions
2 cups (1/2-inch-diced) carrots (3 carrots)
2 cups (1/2-inch-diced) celery (3 stalks)
2 1/2 cups (1/2-inch-diced) peeled butternut squash
1 1/2 tablespoons minced garlic (4 cloves)
2 teaspoons chopped fresh thyme leaves
1 (26-ounce) can or box diced tomatoes, such as Pomi
6 to 8 cups chicken stock, preferably homemade
1 bay leaf
Kosher salt and freshly ground black pepper
1 (15-ounce) can cannellini beans, drained and rinsed
2 cups cooked small pasta, such as tubetti
8 to 10 ounces fresh baby spinach leaves
1/2 cup good dry white wine
2 tablespoons store-bought pesto
Freshly grated Parmesan cheese, for serving

Directions
Heat 2 tablespoons of olive oil over medium heat in a large, heavy pot or Dutch oven. Add the pancetta and cook over medium-low heat for 6 to 8 minutes, stirring occasionally, until lightly browned. Add the onions, carrots, celery, squash, garlic, and thyme and cook over medium heat, stirring occasionally, for 8 to 10 minutes, until the vegetables begin to soften. Add the tomatoes, 6 cups of the chicken stock, the bay leaf, 1 tablespoon salt, and 1 1/2 teaspoons pepper to the pot. Bring to a boil, then lower the heat and simmer uncovered for 30 minutes, until the vegetables are tender. Discard the bay leaf. Add the beans and cooked pasta and heat through. The soup should be quite thick but if it's too thick, I add more chicken stock.

Just before serving, reheat the soup, add the spinach, and toss with 2 big spoons (like tossing a salad). Cook just until the leaves are wilted. Stir in the white wine and pesto. Depending on the saltiness of the chicken stock, add another teaspoon or two of salt to taste. Serve large shallow bowls of soup with a bruschetta on top. Sprinkled with Parmesan cheese, drizzle with olive oil and serve hot.

Saturday, September 27, 2014

Apple-Cream Cheese Bundt Cake

I took the girls to a "pick your own" apple orchard last weekend. The weather was perfect and we left with what seemed like a million pounds of apples and sour stomachs from eating so many of them as we picked.
 
I have been eyeing this bundt cake recipe from Southern Living for months, so I decided to give it a try.  The Cake is TO DIE FOR.  The sweet cream cheese filling and praline frosting make it rich and creamy which is offset nicely with the tart apples.  I have been eating this for breakfast and dessert so my next post will probably have to be some sort of spinach shake.

CREAM CHEESE FILLING:
1 (8-oz.) package cream cheese, softened
1/4 cup butter, softened
1/2 cup granulated sugar
1 large egg
2 tablespoons all-purpose flour
1 teaspoon vanilla extract

APPLE CAKE BATTER:
1 cup finely chopped pecans
3 cups all-purpose flour
1 cup granulated sugar
1 cup firmly packed light brown sugar
2 teaspoons ground cinnamon
1 teaspoon salt
1 teaspoon baking soda
1 teaspoon ground nutmeg
1/2 teaspoon ground allspice
3 large eggs, lightly beaten
3/4 cup canola oil
3/4 cup applesauce
1 teaspoon vanilla extract
3-4 cups peeled and finely chopped apples - I used a few different varieites
PRALINE FROSTING:
1/2 cup firmly packed light brown sugar
1/4 cup butter
3 tablespoons milk
1 teaspoon vanilla extract
1 cup powdered sugar
Preparation
1. Prepare Filling: Beat first 3 ingredients at medium speed with an electric mixer until blended and smooth. Add egg, flour, and vanilla; beat just until blended.
2. Prepare Batter: Preheat oven to 350º. Bake pecans in a shallow pan 8 to 10 minutes or until toasted and fragrant, stirring halfway through. Stir together 3 cups flour and next 7 ingredients in a large bowl; stir in eggs and next 3 ingredients, stirring just until dry ingredients are moistened. Stir in apples and pecans.
3. Spoon two-thirds of apple mixture into a greased and floured 14-cup Bundt pan. Spoon Cream Cheese Filling over apple mixture, leaving a 1-inch border around edges of pan.  Spoon remaining apple mixture over Cream Cheese Filling.
4. Bake at 350º for 1 hour to 1 hour and 15 minutes or until a long wooden pick inserted in center comes out clean. Cool cake in pan on a wire rack 15 minutes; remove from pan to wire rack, and cool completely (about 2 hours).
5. Prepare Frosting: Bring 1/2 cup brown sugar, 1/4 cup butter, and 3 Tbsp. milk to a boil in a 2-qt. saucepan over medium heat, whisking constantly; boil 1 minute, whisking constantly. Remove from heat; stir in vanilla. Gradually whisk in powdered sugar until smooth; stir gently 3 to 5 minutes or until mixture begins to cool and thickens slightly. Pour immediately over cooled cake.


Monday, September 15, 2014

pumpkin banana muffins

We had to turn on the heat this weekend.   Our thermostat read 62 degrees and the girls wouldn't take off their winter jackets, but I still feel guilty about turning on the heat before October!  

Fall is here, whether we like it or not, so in an effort to celebrate its' arrival, I whipped up a batch of these delicious pumpkin banana muffins.  


'Pumpkin Banana Muffins
2 ripe bananas, mashed
2 eggs
1/3 cup vegetable oil
1 1/3 cups canned pumpkin puree
1/2 cup honey
1/2 cup white sugar
2 1/2 cups all-purpose flour
1 teaspoon baking powder
1 teaspoon baking soda
1/2 teaspoon salt
2 teaspoons pumpkin pie spice
1 teaspoon ground cinnamon
3/4 cup raisins or chocolate chips


Directions
Preheat oven to 350 degrees F and spray muffin tins with non-stick cooking spray
In a large bowl, stir together the mashed banana, eggs, oil, pumpkin, honey and sugar. Combine the flour, baking powder, baking soda, salt, pie spice and cinnamon, stir into the banana mixture until just combined. Fold in the raisins and walnuts if desired. Pour batter into the prepared tins.


Bake at 350 degrees F for 25 minutes, or until a toothpick inserted into the center comes out clean. Cool for 10 minutes before moving to a wire rack to cool completely.


Make sure to try out a few more of our favorite pumpkin recipes herehere, herehere, here and here.  Obsessed with pumpkin....maybe :)


Thursday, September 4, 2014

Fusilli alla Caprese

We have tomatoes coming out of our ears and as a result, we have been enjoying an unhealthy amount of BLT's.  Nothing is better than a juicy, salty, and crisp bacon, lettuce and tomato sandwich, but for fear that our arteries were clogging beyond repair, a more heart healthy dinner option was in order.

Our whole family loves caprese salads, so naturally caprese + pasta = mom is a super hero.  The dish was creamy, delicious and it tasted like summer.  

1 pound fusilli pasta
1/3 cup Basil Pesto
3 cups cherry tomatoes, quartered (about 1 1/2 pints)
1 teaspoon salt
1/2 teaspoon freshly ground black pepper
1/2 cup packed fresh basil leaves, torn
8 ounces fresh mozzarella, diced (about 1 1/4 cups)

Bring a large pot of salted water to a boil over high heat. Add the pasta and cook until tender but still firm to the bite, stirring occasionally, about 8 to 10 minutes. Drain pasta into a large bowl and reserve 1/2 cup of the cooking liquid.

In a medium skillet heat the pesto over medium heat. Add the tomatoes, salt, and pepper. As the tomatoes cook and soften, smash them with a fork. Continue to cook until the tomatoes make a chunky style sauce, about 4 minutes. Transfer the tomato sauce to the bowl with the pasta. Toss to combine. Add the basil leaves and mozzarella. Stir to combine. Add the reserved pasta water, 1/4 cup at a time, until the pasta is moist. Serve.


Friday, August 29, 2014

Banana Zucchini Bread

As the end of summer approaches, there seems to be an abundance of zucchini around. We unfortunately did not grow any this year, but people are always bringing in their extras to work that I snatch up. I am a sucker for banana bread and zucchini bread separately, so why not combine the two?? The result?, this delicious recipe.  It is a combination of a couple of different recipes I have tried, with an attempt to make it a little healthier. The result is delicious and the loaf does not last long between Chris and myself.
Yields: 2 loaves, Cook time: 50-60 minutes


Ingredients
2 cups flour
1 cup whole wheat flour
1 1/2 teaspoon baking powder
1 1/2 teaspoon baking soda
1 1/2 teaspoon cinnamon
1 teaspoon salt
4 eggs
1 cup granulated sugar
1 cup brown sugar
1 cup coconut oil (or vegetable oil)
2 bananas
1 1/2 cup shredded zucchini
1 cup pecans or walnuts


 Preheat oven to 350 degrees. Prepare two bread pans and set aside. In a bowl mix together dry ingredients and set aside. 

Using a standing mixer whisk eggs. Add sugars and oil, whisking until smooth. Add bananas. Then add dry mixture until just combined. Fold in zucchini and walnuts.

Divide batter between bread pans. Bake for 50-60 minutes, until tester comes out clean. Let cool on drying rack for 10 minutes. Enjoy!


Monday, August 25, 2014

S'mores Cheesecake

Summer is OVER. I cannot believe it. My kids have started school and the pool is closing this weekend.  Why doesn't February ever fly by like this?

I have been a horrible blogger, and a horrible baker/cook etc all summer, so in a ditch effort to redeem myself for months of nothing, I whipped up this S'mores Cheesecake.

The recipe is easy, but you have to make sure you start it a day ahead of when you want to serve it.  If you are a s'mores fan, pin this *&$%.  It is creamy, chocolaty and delish.

S'mores Cheesecake - Bon Appetit

INGREDIENTS:
CRUST
1 1/2 cups graham cracker crumbs (made from 9 whole crackers finely ground in processor; 1 packet)
3 tablespoons sugar
6 tablespoons (3/4 stick) unsalted butter, melted

FILLING
9 ounces high-quality milk chocolate (I used half milk choco and half dark choco), chopped
2 8-ounce packages cream cheese, room temperature
3/4 cup sugar
1/8 teaspoon salt
3/4 cup heavy whipping cream
3 large eggs

TOPPING
1 cup sugar
2 large egg whites
3 tablespoons water
1 teaspoon cream of tartar
1/8 teaspoon salt
12 large marshmallows, cut into quarters with wet kitchen scissors
1/2 teaspoon vanilla extract

RECIPE

FOR CRUST
Position rack in center of oven and preheat to 350°F. Mix crumbs and sugar in medium bowl. Add melted butter; stir until mixture is evenly moistened. Press onto bottom of 9-inch-diameter springform pan with 2 3/4-inch-high sides. Bake until set, about 12 minutes. Remove from oven; cool. Reduce oven temperature to 325°F.

FOR FILLING
Stir chocolate in top of double boiler set over barely simmering water until smooth. Remove from over water and cool to lukewarm, stirring occasionally.
Combine cream cheese, sugar, and salt in processor and blend until smooth. With motor running, add whipping cream through feed tube and process just until blended. With motor running, add melted chocolate, then add eggs 1 at a time, blending and scraping down sides after each addition until mixture is smooth. Pour batter over crust in pan.
Bake cake until outer edge is slightly puffed and cake is barely set in center (center will look shiny and move slightly when pan is gently shaken), about 55 minutes. Transfer cake to rack. Run small sharp knife around cake to loosen. Chill uncovered until cold, 8 hours or overnight. DO AHEAD Can be made 2 days ahead. Cover and keep refrigerated.

FOR TOPPING
Whisk sugar, egg whites, 3 tablespoons water, cream of tartar, and 1/8 teaspoon salt to blend in large metal bowl. Set bowl over saucepan of simmering water; whisk constantly until sugar dissolves and mixture thickens and is hot to touch, about 3 minutes. Remove bowl from over water and stir in marshmallows (keep water simmering in saucepan). Let stand until marshmallows soften, about 3 minutes. Set bowl with mixture over simmering water; using handheld electric mixer, beat until stiff shiny peaks form, about 4 minutes. Beat in vanilla.
Scrape topping onto cheesecake. Using offset metal spatula, spread topping to edges of cake, swirling decoratively. Let stand until set, about 15 minutes.
Using kitchen torch, lightly brown topping in spots. (Or preheat broiler; place cake at least 4 inches from heat source and broil just until topping is lightly browned in spots, watching closely to avoid burning, about 2 minutes.) Chill cake until cold. DO AHEAD: Can be made 1 day ahead. Cover with cake dome and keep chilled. Remove pan sides. Place cake on platter.


Sunday, July 27, 2014

Whole Wheat Pizza Crust

I love when I take the time to plan ahead to make a homemade pizza crust for our favorite pizzas.  At the frequency we eat pizza, you would think I would be smart enough to always have one in the freezer, but unfortunately I am not. However a homemade crust can be one of the best parts. This recipe makes two pizza crusts, is not too time intensive and is delicious. Prep time: 20 minutes, Total time: 2 hours.

Ingredients:
2 1/2 cups all purpose flour
1 1/3 cup whole-wheat flour
2 1/2 tsp quick-rise yeast (1 package)
2 tsp salt
1 tsp sugar
1 1/4 cup warm water (110F), + as needed
2 tbsp olive oil


Using a food processor, combine flours, yeast, salt and sugar. Pulse to mix ingredients. With the motor running, in a steady stream add the water and olive oil. Pulse until dough comes together in a rough mass, approximately 15 seconds. If dough does not form into a ball, add more water a tablespoon at a time, until a rough ass forms.  Let rest for 10 minutes. Pulse again for 30 seconds. Dough should be tacky to the touch but not sticky. Transfer dough to a lightly floured surface and form into a small ball. Lightly oil a bowl and place the dough inside. Cover with plastic wrap and place in a warm place to rise for approximately 1 1/2 hours.

Once the dough has doubled in bulk and is spongy, punch out the dough on a floured work surface and kneed into a smooth cylinder. Divide the dough into two equal pieces, shaping each into smooth ball. If dough becomes sticky, dust with flour. Cover the each dough with a clean kitchen towel and let rest for 10 minutes before making your pizza. If you are freezing one of the doughs, place in a zip-lock bag and freeze for up to two months. When ready to use, let thaw for 3-4 hours at room temperature. I have also found that if you make this the day before, you can place in the refrigerator overnight. Bring to room temperature a hour before using.

For some great homemade pizza recipes, check out these great recipes: Shaved Asparagus Pizza, Barbecue Chicken Pizza, Butternut Squash & Pesto Pizza and the Fig and prosciutto pizza.


Thursday, July 17, 2014

Low Fat Blueberry Banana Muffins

We had a family wedding outside of San Francisco last weekend, which was incredibly fun!  We spent the 2 days leading up to the big event, enjoying all that San Fran has to offer. Not surprisingly,  my tour of the city focused on visiting different bakeries, restaurants, and watering holes.  I had more pastries in a 48 hour period than I usually eat in a month, and every single one of them was delicious and totally worth it.  Unfortunately for me this type of indulgence cannot be continued back in Wi, unless I want to pull out the maternity pants, so when my body went through withdrawal from not eating flaky chocolate filled croissants, I decided to give these low fat muffins a try.  The recipe does not call for any butter or oil, and they still taste delicious.   We blew through a dozen in 2 days!


Low Fat Blueberry Banana Muffins - Recipe from Sally's Baking Addiction
2 and 1/2 cup white whole wheat flour (or mix of whole wheat and all-purpose)
1 teaspoon baking soda
1/4 teaspoon salt
1/2 teaspoon ground cinnamon
1/4 cup honey
1/2 cup light brown sugar, loosely packed (or dark brown sugar)
1 cup mashed very ripe banana (about 2 large very ripe bananas)
1/4 cup nonfat vanilla greek yogurt (or any yogurt)
1 large egg, beaten
3/4 cup milk (I used almond milk)
1 and 1/4 cup fresh or unthawed frozen blueberries

Directions:
Preheat oven to 325F degrees. Spray 15 muffin tins with nonstick spray.* Set aside.
In a large bowl, gently toss the flour, baking soda, salt, and cinnamon together until combined. Set aside.

In a separate bowl, mix the honey and brown sugar together - it will be thick and lumpy. Try to get out as many lumps as you can - a fork works well to break it up. Add the mashed banana, yogurt, and beaten egg. Slowly pour the wet ingredients into the dry ingredients. Gently begin to fold it all together. It will be very thick. Add the milk slowly and continue to gently mix the ingredients together. The milk will thin everything out, but the batter will still remain thick. Gently fold in the blueberries. Do not overmix the batter, which will lend tough, dry muffins.

Divide the batter between 12 muffin tins. Fill all the way to the top.  Bake for 17-18 minutes until very lightly browned on the edges. A toothpick inserted in the center should come out clean. Allow the muffins to cool completely.

Each muffin is 131 calories each based on using nonfat vanilla greek yogurt and unsweetened almond milk. Muffins taste best the next day, like most banana bread recipes. Muffins remain fresh and moist stored at room temperature for up to 5 days. Muffins freeze well, up to 3 months.


Evidence that I could not control myself at Tartine!


Wednesday, July 2, 2014

strawberry rhubarb hand-pies

Hand pies are the perfect picnic dessert, especially for the upcoming holiday weekend!  They are easy to transport, they require zero utensils (or plates for that matter), you just grab and enjoy.  I combined a few different recipes to make these strawberry rhubarb cuties, and they were delicious!

Crust
3 3/4 cups all-purpose flour
1/2 teaspoon fresh orange zest (optional)
1 1/2 tablespoons granulated sugar
1 1/2 teaspoons table salt
1 1/2 cups unsalted butter, very cold and cut into small cubes
3/4 to 1 cup buttermilk 

Rhubarb Filling
1 cup finely chopped fresh strawberries
1 cup finely chopped fresh rhubarb
1/2 cup sugar
2 tablespoons cornstarch
1 1/2 teaspoons grated orange peel

To assemble
1 large egg
1 tablespoon water
Coarse sugar


Make pie dough: Whisk together flour, zest, sugar and salt in the bottom of a large bowl. Using a pastry blender, work the butter into the flour until the biggest pieces of butter are the size of tiny peas.  Gently stir in 3/4 cup buttermilk with a rubber spatula, mixing it until a craggy mass forms. Get your hands in the bowl and knead it just two or three times to form a ball. If it doesn’t come together, add remaining 1/4 cup buttermilk, 1 tablespoon at a time, until it does, then gently knead again. Divide dough in half. Wrap each half in plastic wrap and flatten a bit, like a disc. Chill in fridge for at least an hour or up to two days.

Make rhubarb filling: Place rhubarb , strawberries, cornstarch, orange peel and sugar in a small-to-medium saucepan with sugar and stir to combine. Cover and cook at medium-low heat for 15 minutes, no need to stir. Increase the heat to medium, remove the lid and cook for another 10 to 15 minutes, until rhubarb is broken down and ideally thick enough that if you run a spoon across the bottom of the pot, you can see a trench quickly form and disappear.  Spread mixture on a large plate in the fridge or freezer to cool quickly, then scrape into a bowl. Keep cold until needed; it will be thicker and easier to “scoop” onto the pie bases.

Assemble pies: Heat oven to 400 degrees. Line two to three baking sheets with parchment paper. Beat your remaining egg and 1 tablespoon water and keep aside with a pastry brush.

Flour your counter and start rolling your dough by pressing down lightly with the pin and moving it from the center out. Roll it a few times in one direction, lift it up and rotate it a quarter-turn. Continue to do, roll a couple times, lifting the dough and rotating it until the dough is just shy of 1/8-inch thick. Using a biscuit cutter or glass, cut dough into circles. 

Brush half the circles very, very lightly with the egg wash; these will be your bases. Cut a small vent in the other half of the circles; these will be your lids. In the center of each egg washed square, put a small dollop (2TBS) rhubarb filling. Top each filled base with a vented circle. Press outer edge of top and bottom all around to seal with your fingertips; a fork will work as well. Transfer pie to a baking sheet, spacing 1-inch apart. Brush the tops with egg wash and sprinkle generously with coarse sugar. Repeat with remaining dough, including second half from fridge, and fillings.

Bake for 15 to 20 minutes, until puffed and golden, and even more brown at edges. Transfer to cooling racks and cool to room temperature before serving.


Friday, June 27, 2014

Blueberry Syrup


ahhhh summer, here at last!

My refrigerator is bursting with produce and the girls and I are loving it, except for some reason my lovlies are boycotting blueberries this week. Why? No idea, but I am pretty positive that they will be back in good standing sometime in the near future.

In the meantime, I had to come up with a plan for my 3+ pints of blueberries and I decided on making a blueberry syrup.  You can add the syrup to anything - pancakes, waffles, ice cream, oatmeal (i had it this morning), the possibilities are endless and the blueberry flavor makes everything sing summer.  


blueberry syrup:

Ingredients
1 1/2 pints fresh blueberries, rinsed
1 cup vanilla sugar
1 tablespoon fresh lemon juice


Directions
Combine the blueberries and vanilla sugar in a large heavy saucepan. Add 1 cup water and the lemon juice and bring to a boil over high heat, stirring occasionally. Reduce the heat and simmer for 15 minutes, or until the mixture begins to thicken.

Remove from the heat and strain through a fine sieve. Cool to room temperature, cover and refrigerate.


Tuesday, June 24, 2014

chicken, corn, zucchini, and black bean enchiladas

Enchiladas are one of my favorite meals to make, because they are simple, quick and delicious. I found this recipe in the True Food cookbook, and have made it several times, tweaking it a little differently each time depending what I have in my fridge. These are delicious and I don't feel as guilty about eating them, since they are filled with fresh, seasonal vegetables that I can usually find at the farmers market.  


Ingredients
2  cups corn kernels 
    (from 2 ears of corn)
1 1/2 cup diced roasted 
    chicken
1  red pepper
1  poblano chile, roasted, 
   seeded and diced
1  small zucchini, diced
1/3 cup cooked black beans
3  ounces Manchego 
   cheese, diced
1/4  teaspoon chili powder
    salt and pepper
6  corn tortillas
1/2 cup shredded Manchego cheese
1  Jar tomatillos salsa
6  tablespoons Greek-style yogurt
2  teaspoons chopped cilantro
6  lime wedges


1. Start by roasting the Poblano. If you have a gas stove, the easiest way to do this is turn on a burner and place the Poblano directly about the fire. Rotate the Poblano, allowing the outer skin to blacken. Once the majority of the pepper has blackened, remove it from flame and put it in a bowl, covering it with plastic wrap. Once the pepper has cooled, peal off the skin, seed and chop. If you don't have a gas stove, you can roast the pepper in the oven by broiling it, using the same technique, rotating until blackened. 

2. Meanwhile, place the corn kernels and red pepper in a large skilled over medium heat, stirring occasionally until lightly browned. 

3. Preheat oven to 350 degrees. In a large mixing bowl combine chicken, zucchini, black beans diced Manchego, corn, red pepper, diced poblano, and chili powder. Mix well, adding salt and pepper to taste. 

4. Ladle 1/4 cup of the Tomatillo salsa into a shallow, oven dish (9x9).  Taking a tortilla spoon the filling into the center of the tortilla, rolling it and placing it seam down in the baking dish. Fill remainder of tortillas. (If you have extra filling, place in dish at the ends of the tortilla.)  

5. Top with the remainder 3/4 cup of the tomatillos salsa and shredded Manchego. Bake for approximately 30 minutes. Let cool slightly. Serve with greek yogurt, cilantro and lime.  


I have recently been obsessed with a new tortilla shells called La Tortilla Factory. There are many varieties, but my personal favorite the green chile tortillas. :)

I have been slacking on posting because I have been busy making some of my favorites from the blog. Make sure to check out the S'more Bars, Rhubarb muffins, Strawberry Rhubarb Pie and Strawberry Bruschetta


Saturday, June 14, 2014

Tagalongs


Bridget and I have been slacking on our posts. We are both still baking/cooking a lot, but we haven't been sharing.  Not because we are like my toddlers and HATE sharing, but because we finally have some reprieve from our awful winter and we are enjoying the summer-ish weather.

I am beyond excited for all of the summer produce to arrive at the Farmer's market, but until that happens, I will continue to survive on food comprised of Peanut Butter and Chocolate, like these amazing homemade tagalongs!


Tagalongs - Recipe from Siriously Delicious


Cookies:
1 cup (2 sticks) unsalted butter, room temp
1/2 cup powdered sugar
1/2 tsp vanilla
1/8 tsp almond extract
2 cups all-purpose flour
1/2 tsp salt

Filling:
3/4 cup creamy peanut butter
1/2 cup powdered sugar
1/4 tsp vanilla
Pinch of salt

Coating:
6 oz. milk chocolate, chopped
6 oz. semi-sweet or dark chocolate, chopped
1 tsp vegetable oil

With an electric mixer, cream butter and powdered sugar until smooth. Add vanilla and almond extract and mix. In a separate bowl, sift together flour and salt. Slowly add sifted ingredients to butter/sugar and mix until combined. Shape dough into a disc, cover in plastic wrap and chill for 30 minutes.

Using a small circular cookie cutter (also lightly floured), cut out cookies and place on parchment lined baking sheet.

Bake for 12-15 minutes, or until edges just begin to turn golden. Let cool.

While cookies are cooling, with mixer combine peanut butter, powdered sugar, vanilla and a pinch of salt. Once cookies have cooled, scoop approx. 1/2 tsp of filling on top of each cookie. Using a knife, place the tip in the middle of the peanut butter, and spread down to the side of cookie. Repeat that motion as you go around the cookie. It should look slightly domed in the middle.

In a double boiler (or place a heat-proof bowl over a pot of simmering water, making sure the water does not touch the bowl), melt all chopped chocolate. Add vegetable oil and stir until you have a glossy chocolate. Using 2 forks, dip cookie into chocolate. Make sure to flip over and cover cookie completely. Lift cookie out of chocolate with one fork, using the other to scrape excess chocolate off the bottom. Repeat with each cookie and place them on foil or parchment paper. Let cookies cool at room temp and then peel off paper or foil.


Friday, May 30, 2014

Pork Chops with Rhubarb Sauce


    My neighbor has mutant rhubarb plants. Supposedly she brought them with her when she moved from Colorado, but they are clearly from another planet. It is only May and the plants are bigger than most of the bushes in our yard. Luckily for me, the freaky plants produce so much fruit that my neighbor has been delivering rhubarb to us on a weekly basis. 
    I tried this pork recipe last night and it was delicious.  The rhubarb sauce is savory and the cherries add a hint of sweetness.  It is a super healthy way to dress-up a pork chop and it is an easy weeknight meal that you can make for the whole fam. 
Pork Chops with Rhubarb Sauce - Martha Stewart

1/2 cup dried cherries (or any other dried fruit)                    
1 tablespoon balsamic vinegar
1 teaspoon plus 2 tablespoons olive oil
1/2 cup finely chopped onion
8 to 10 ounces rhubarb, ends trimmed, cut crosswise into 1/2-inch pieces (2 cups)
3 tablespoons sugar
Pinch of ground nutmeg
Coarse salt and ground pepper
4 pork loin chops, (each 1/2 inch thick and 6 to 8 ounces)

    DIRECTIONS
    In a small bowl, combine cherries with vinegar and 1/4 cup hot water; let stand 10 minutes to soften.
    In a small saucepan, heat 1 teaspoon oil over medium-low heat. Add onion; cook until softened, stirring occasionally, about 10 minutes.
    To the saucepan, add cherry mixture, rhubarb, and sugar; bring to a boil. Reduce heat; simmer until rhubarb has softened, 5 to 8 minutes. Stir in nutmeg; season with salt and pepper. Remove from heat; keep warm.
    Generously season both sides of pork chops with salt and pepper. In a large skillet, heat remaining 2 tablespoons oil over medium-high heat. Cook pork (in two batches, if necessary, to avoid crowding the pan) until browned and cooked through, 3 to 4 minutes per side. Serve topped with warm sauce. ** I grilled the chops on our outdoor grill. 


More delicioso rhubarb recipes here, herehere

    Tuesday, May 27, 2014

    Cookie Dough Peanut Butter Truffles


    Egg-less cookie dough, covered in chocolate & peanut butter.  How could a small bite like this be more perfect? IT CAN'T.

    I found this recipe 2 weeks ago and I am on batch #3. Apparently I missed the memo on the fact that swimsuit season is now HERE.  Ug, I should be doing lunges instead of trying to win the "I'm going to need an entire new wardrobe because I have eaten so many cookie dough truffles" contest.

    You can switch up your dough by adding in different flavored chips, dried fruit, nutella - whatever you want.  The possibilities are endless and thankfully for me, so is the stretch in my elastic-waist pants.