Showing posts with label wisconsin. Show all posts

Monday, August 25, 2014

S'mores Cheesecake

Summer is OVER. I cannot believe it. My kids have started school and the pool is closing this weekend.  Why doesn't February ever fly by like this?

I have been a horrible blogger, and a horrible baker/cook etc all summer, so in a ditch effort to redeem myself for months of nothing, I whipped up this S'mores Cheesecake.

The recipe is easy, but you have to make sure you start it a day ahead of when you want to serve it.  If you are a s'mores fan, pin this *&$%.  It is creamy, chocolaty and delish.

S'mores Cheesecake - Bon Appetit

INGREDIENTS:
CRUST
1 1/2 cups graham cracker crumbs (made from 9 whole crackers finely ground in processor; 1 packet)
3 tablespoons sugar
6 tablespoons (3/4 stick) unsalted butter, melted

FILLING
9 ounces high-quality milk chocolate (I used half milk choco and half dark choco), chopped
2 8-ounce packages cream cheese, room temperature
3/4 cup sugar
1/8 teaspoon salt
3/4 cup heavy whipping cream
3 large eggs

TOPPING
1 cup sugar
2 large egg whites
3 tablespoons water
1 teaspoon cream of tartar
1/8 teaspoon salt
12 large marshmallows, cut into quarters with wet kitchen scissors
1/2 teaspoon vanilla extract

RECIPE

FOR CRUST
Position rack in center of oven and preheat to 350°F. Mix crumbs and sugar in medium bowl. Add melted butter; stir until mixture is evenly moistened. Press onto bottom of 9-inch-diameter springform pan with 2 3/4-inch-high sides. Bake until set, about 12 minutes. Remove from oven; cool. Reduce oven temperature to 325°F.

FOR FILLING
Stir chocolate in top of double boiler set over barely simmering water until smooth. Remove from over water and cool to lukewarm, stirring occasionally.
Combine cream cheese, sugar, and salt in processor and blend until smooth. With motor running, add whipping cream through feed tube and process just until blended. With motor running, add melted chocolate, then add eggs 1 at a time, blending and scraping down sides after each addition until mixture is smooth. Pour batter over crust in pan.
Bake cake until outer edge is slightly puffed and cake is barely set in center (center will look shiny and move slightly when pan is gently shaken), about 55 minutes. Transfer cake to rack. Run small sharp knife around cake to loosen. Chill uncovered until cold, 8 hours or overnight. DO AHEAD Can be made 2 days ahead. Cover and keep refrigerated.

FOR TOPPING
Whisk sugar, egg whites, 3 tablespoons water, cream of tartar, and 1/8 teaspoon salt to blend in large metal bowl. Set bowl over saucepan of simmering water; whisk constantly until sugar dissolves and mixture thickens and is hot to touch, about 3 minutes. Remove bowl from over water and stir in marshmallows (keep water simmering in saucepan). Let stand until marshmallows soften, about 3 minutes. Set bowl with mixture over simmering water; using handheld electric mixer, beat until stiff shiny peaks form, about 4 minutes. Beat in vanilla.
Scrape topping onto cheesecake. Using offset metal spatula, spread topping to edges of cake, swirling decoratively. Let stand until set, about 15 minutes.
Using kitchen torch, lightly brown topping in spots. (Or preheat broiler; place cake at least 4 inches from heat source and broil just until topping is lightly browned in spots, watching closely to avoid burning, about 2 minutes.) Chill cake until cold. DO AHEAD: Can be made 1 day ahead. Cover with cake dome and keep chilled. Remove pan sides. Place cake on platter.


Wednesday, July 2, 2014

strawberry rhubarb hand-pies

Hand pies are the perfect picnic dessert, especially for the upcoming holiday weekend!  They are easy to transport, they require zero utensils (or plates for that matter), you just grab and enjoy.  I combined a few different recipes to make these strawberry rhubarb cuties, and they were delicious!

Crust
3 3/4 cups all-purpose flour
1/2 teaspoon fresh orange zest (optional)
1 1/2 tablespoons granulated sugar
1 1/2 teaspoons table salt
1 1/2 cups unsalted butter, very cold and cut into small cubes
3/4 to 1 cup buttermilk 

Rhubarb Filling
1 cup finely chopped fresh strawberries
1 cup finely chopped fresh rhubarb
1/2 cup sugar
2 tablespoons cornstarch
1 1/2 teaspoons grated orange peel

To assemble
1 large egg
1 tablespoon water
Coarse sugar


Make pie dough: Whisk together flour, zest, sugar and salt in the bottom of a large bowl. Using a pastry blender, work the butter into the flour until the biggest pieces of butter are the size of tiny peas.  Gently stir in 3/4 cup buttermilk with a rubber spatula, mixing it until a craggy mass forms. Get your hands in the bowl and knead it just two or three times to form a ball. If it doesn’t come together, add remaining 1/4 cup buttermilk, 1 tablespoon at a time, until it does, then gently knead again. Divide dough in half. Wrap each half in plastic wrap and flatten a bit, like a disc. Chill in fridge for at least an hour or up to two days.

Make rhubarb filling: Place rhubarb , strawberries, cornstarch, orange peel and sugar in a small-to-medium saucepan with sugar and stir to combine. Cover and cook at medium-low heat for 15 minutes, no need to stir. Increase the heat to medium, remove the lid and cook for another 10 to 15 minutes, until rhubarb is broken down and ideally thick enough that if you run a spoon across the bottom of the pot, you can see a trench quickly form and disappear.  Spread mixture on a large plate in the fridge or freezer to cool quickly, then scrape into a bowl. Keep cold until needed; it will be thicker and easier to “scoop” onto the pie bases.

Assemble pies: Heat oven to 400 degrees. Line two to three baking sheets with parchment paper. Beat your remaining egg and 1 tablespoon water and keep aside with a pastry brush.

Flour your counter and start rolling your dough by pressing down lightly with the pin and moving it from the center out. Roll it a few times in one direction, lift it up and rotate it a quarter-turn. Continue to do, roll a couple times, lifting the dough and rotating it until the dough is just shy of 1/8-inch thick. Using a biscuit cutter or glass, cut dough into circles. 

Brush half the circles very, very lightly with the egg wash; these will be your bases. Cut a small vent in the other half of the circles; these will be your lids. In the center of each egg washed square, put a small dollop (2TBS) rhubarb filling. Top each filled base with a vented circle. Press outer edge of top and bottom all around to seal with your fingertips; a fork will work as well. Transfer pie to a baking sheet, spacing 1-inch apart. Brush the tops with egg wash and sprinkle generously with coarse sugar. Repeat with remaining dough, including second half from fridge, and fillings.

Bake for 15 to 20 minutes, until puffed and golden, and even more brown at edges. Transfer to cooling racks and cool to room temperature before serving.


Friday, June 27, 2014

Blueberry Syrup


ahhhh summer, here at last!

My refrigerator is bursting with produce and the girls and I are loving it, except for some reason my lovlies are boycotting blueberries this week. Why? No idea, but I am pretty positive that they will be back in good standing sometime in the near future.

In the meantime, I had to come up with a plan for my 3+ pints of blueberries and I decided on making a blueberry syrup.  You can add the syrup to anything - pancakes, waffles, ice cream, oatmeal (i had it this morning), the possibilities are endless and the blueberry flavor makes everything sing summer.  


blueberry syrup:

Ingredients
1 1/2 pints fresh blueberries, rinsed
1 cup vanilla sugar
1 tablespoon fresh lemon juice


Directions
Combine the blueberries and vanilla sugar in a large heavy saucepan. Add 1 cup water and the lemon juice and bring to a boil over high heat, stirring occasionally. Reduce the heat and simmer for 15 minutes, or until the mixture begins to thicken.

Remove from the heat and strain through a fine sieve. Cool to room temperature, cover and refrigerate.


Friday, March 14, 2014

Cauliflower Soup

Yep, still winter here in Wi.  Yep, still want to eat everything in the house to make myself feel warm and comforted.  Nope - pants with a waist are not my favorite right now.   

A healthy vegetable soup recipe that could solve all of my problems (well, maybe) - Yes, I'll try it! 
I  made this cauliflower soup recipe last night and it was delicious. Warm, creamy and packed full of veggies. I decided to puree the soup because my girls prefer to eat it smooth vs. chunky, but feel free to eat it either way!


Cauliflower Soup

1 & 1/2 medium heads of cauliflower, broken into florets
3 medium carrot, shredded
1/2 cup chopped celery
3 1/2 cups low sodium chicken stock
3 tablespoons butter
3 tablespoons all-purpose flour
3/4 teaspoon salt
1/8 teaspoon pepper
2 cups low-fat milk
1 cup (4 ounces) shredded cheddar cheese
1/2 to 1 teaspoon hot pepper sauce, optional


In a large stock pot, combine the cauliflower, carrot, celery and broth. Bring to a boil. Reduce heat; cover and simmer for 12-15 minutes or until vegetables are tender (do not drain).
In another large saucepan, melt butter. Stir in the flour, salt and pepper until smooth. Gradually add milk. Bring to a boil over medium heat; cook and stir for 2 minutes or until thickened.
Reduce heat. Stir in the cheese until melted. Add hot pepper sauce if desired. Stir into the cauliflower mixture.  Use a immersion blender and blend the mixture until smooth. Serve and enjoy! 

Friday, December 20, 2013

Chocolate Nutella and Sea Salt Fudge

Rewind to a month ago, I would spend the girls' nap time working out, cleaning, sewing, stalking people on Facebook, you know the usual stuff. For the past week, my "nap times" have solely consisted of baking, baking some more and then "testing" all of the baked goods.  Yesterday I made peanut butter blossoms (an oldie but a goodie) and I took a stab at making a new treat, Chocolate Nutella & Sea Salt Fudge.
Yes, it does taste as amazing as you would imagine.  

I definitely licked the spoon, and bowl clean.

Chocolate Nutella & Sea Salt Fudge
1 Tbs butter for greasing the pan
1 can (14oz) sweetened condensed milk
1 tsp vanilla extract
8 oz high quality bittersweet 60% chocolate chips
1 cup Nutella, room temperature
3 Tbs unsalted butter, room temperature, cut into 1/2 inch pieces
1/2 tsp sea salt

Grease the bottom and sides of a 8x8 inch baking pan.  Line the pan with parchment paper, leaving a 2-inch overlap on the sides.

In a medium glass bowl, stir together sweetened condensed milk, vanilla, chocolate chips, Nutella and butter. Form a double boiler by setting the bowl over a medium pot of gently simmering water. The water level should be low enough that the bottom of the bowl does not touch the water.  Stir until the chocolate chips are melted and the mixture is smooth, 5 to 7 minutes.
Scrape the mixture into the prepared pan, spread the top smooth with a spatula and sprinkle with sea salt. Refrigerate until the fudge is firm, at least 2 hours.

Once the fudge is chilled, run a knife under hot water, dry it off, and run it around the edges of the pan to loosen the fudge.  Using the overhanging parchment paper, lift the fudge out. Peel off the parchment paper. Cut the fudge into 3/4 inch squares.  Store in the refrigerator in an airtight container or wrapped well in plastic wrap and foil.

Wednesday, December 18, 2013

Candy Cane Kiss Cookies


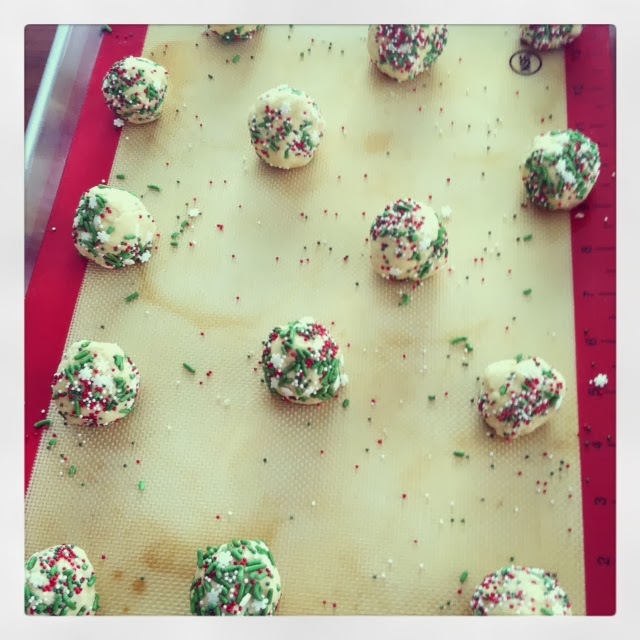
I made this cookie for the first time yesterday and it is already a favorite with my girls. They are bite-sized, colorful and buttery with a peppermint kiss. What more could you ask for in a Christmas cookie?! 
This easy (and very quick) recipe is from Sally's Baking Addiction. Her blog has some amazing looking cookies on it right now!

Ingredients
10 Tbs unsalted butter, softened to room temp
1 cup granulated sugar
2 egg yolks (room temperature)
1 tsp vanilla extract
1 and 1/2 cups unbleached all-purpose flour
3/4 tsp baking powder
1/4 tsp salt
sprinkles
24 Candy Cane Hershey Kisses

Directions:

Preheat oven to 350F degrees. Line two large baking sheets with parchment paper or silicone baking mats. Set aside. Using a hand-held or stand mixer with a paddle attachment, cream the butter and sugar together on medium speed for 5 full minutes, scraping down the sides and the bottom as necessary. Add the egg yolks and vanilla, beating on medium-high until fully combined. Scrape down the sides and bottom of the bowl as necessary. In a medium bowl, toss the flour, baking powder, and salt together. Add the flour mixture to the wet ingredients on low speed until fully combined. The dough will be very thick. If the dough is extremely sticky, chill for at least 45 minutes.

Roll dough into balls, a little less than 1 Tablespoon of dough each. The dough may seem dry, but the warmth of your hands will allow it to come together in a ball. Roll into assorted sprinkles and bake for 8-10 minutes. The cookies will look very, very under baked. That's what you need. Do not over bake. Allow the cookies to cool on the baking sheet for about 5 minutes. Press a Hershey Kiss into the center and immediately put the cookie sheet into the freezer for 5 minutes. Doing this will prevent the kiss from melting. Cookies remain fresh tightly covered at room temperature for 1 week.


Monday, December 16, 2013

White-Chocolate Cherry Shortbread

Going to bed last night, I vowed not to eat sweets during the upcoming week. Now I find myself trying to determine what goes into the category of "sweet".   Do snacks like chocolate covered raisins, frozen yogurt, hot chocolate and granola count as a sweet?  Not in my book.  
Some people might say that it gets trickier when trying to decide if items such as gingerbread and shortbread are sweets, but once again, I have decided NO, they are not.  I wouldn't count whole wheat bread or 9 grain or even white bread as a sweet, so why would shortbread or gingerbread be a sweet?! 

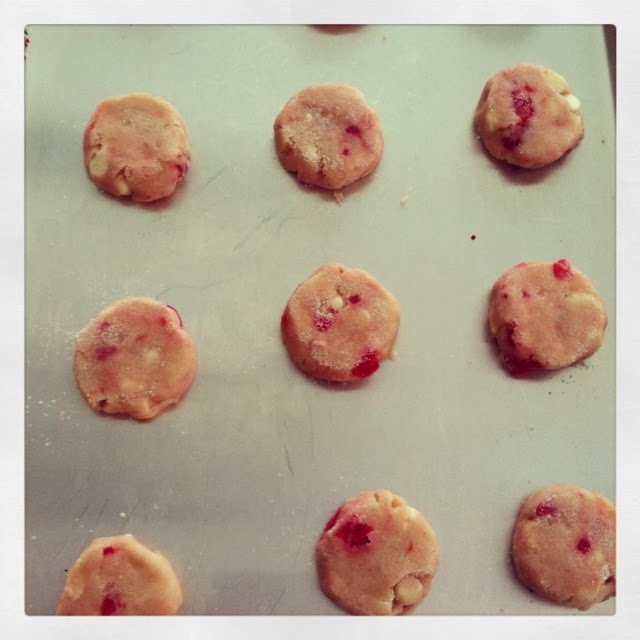
With this rationale, I had zero guilt when I made (and ate) these delicious White-Chocolate Cherry Shortbread cookies today. 


White-Chocolate Cherry Shortbread
(recipe - Better Homes & Gardens)
Ingredients
1/2 cup of maraschino cherries, drained and finely chopped
2 1/2 cups of all-purpose flour
1/2 cup of sugar
1 cup of cold butter
12 ounces of white chocolate baking squares with cocoa butter, finely chopped
1/2 teaspoon of almond extract
2 drops red food coloring (optional)
2 teaspoons of shortening
White nonpareils and/or red edible glitter (optional)

Directions
Preheat oven to 325 degrees F. Spread cherries on paper towels to drain well.
In a large bowl, combine flour and sugar. Using a pastry blender, cut in the butter until mixture resembles fine crumbs. Stir in drained cherries and 4 ounces (2/3 cup) of the chopped chocolate. Stir in almond extract and, if desired, food coloring. Knead mixture until it forms a smooth ball.
Shape dough into 3/4-inch balls. Place balls 2 inches apart on an ungreased cookie sheet. Using the bottom of a drinking glass dipped in sugar, flatten balls to 1-1/2-inch rounds.
Bake in preheated oven for 10 to 12 minutes or until centers are set. Cool for 1 minute on cookie sheet. Transfer cookies to a wire rack and let cool.
In a small saucepan, combine remaining 8 ounces white chocolate and the shortening. Cook and stir over low heat until melted. Dip half of each cookie into chocolate, allowing excess to drip off. If desired, roll dipped edge in nonpareils and/or edible glitter. Place cookies on waxed paper until chocolate is set.


Thursday, December 12, 2013

Gingerbread - Chocolate Chip Muffins

I am struggling with the fact that Christmas is less than 2 weeks away.  The late Thanksgiving has really caught me off guard, so instead of coming to you with tidings of comfort and joy I bring tidings of panic and stress. My Christmas cards arrived today (LATE) and the machine that cut them, chopped off a big chunk of the wording.  AHHHHH.  I called the company and they told me that they should have them done by late next week - the 21st??  WHAT?!  I have been so busy doing random, but very important holiday related things, sewing, baking, gifting, (oh and taking care of my kids) that Dan had zero pairs of clean underwear to take on a business trip...oops. So, In an effort to remain sane and to ensure that I enjoy Christmas, I have decided 3 things. 

1. I need a boot to drink my morning coffee out of, so I have enough energy to get through my day
2. Dan might have to start doing his own laundry
3. I need to slow down, and remember what this season is really about.....eating. 

Try these. They are awesome (and very fast to make)

GINGERBREAD & DARK CHOCOLATE  MUFFINS

3 cups all purpose flour (or white-whole wheat flour)
1/4 teaspoon salt
1 and 1/2 teaspoons baking soda
1 and 1/2 teaspoons ground ginger
2 teaspoons ground cinnamon
1/2 teaspoon ground cloves
3/4 cup dark molasses
1/2 cup butter
1/2 cup dark brown sugar
1 large egg
3/4 cup plain or vanilla yogurt
1/4 cup  milk
1 cup dark chocolate chips


Directions:

Preheat oven to 350F. Spray 12 cup muffin tin with non-stick spray or line with muffin liners.

In a large bowl, mix together flour, salt, baking soda, ginger, cinnamon and cloves. Set aside.

In a microwave-safe bowl, heat the molasses and butter on high for about 1 minute in the microwave. Stir until thoroughly mixed together. Set aside. In a second bowl, whisk together the brown sugar, egg, yogurt, and milk. Pour into the butter. molasses mixture and whisk until everything is incorporated. Pour wet ingredients into dry and mix until  combined. Do not overmix. Batter will be very thick and lumpy.

Fill your muffin tins to the very top and bake for 20 minutes at 350F.  Muffins are finished when a toothpick inserted into the center comes out clean.


Don't forget to make my favorite eggnog and cranberry muffins this holiday season (recipe here).  AND, if you love the combo of ginger and chocolate try these and these!

Saturday, November 30, 2013

Bison Chili

Winter is here in Denver (at least for the past week) and the snow has actually stayed on the ground!  We woke up at the crack of dawn on Saturday to head up to the slopes for the first time, and surprisingly enough. there was very little traffic and the sky was crystal clear.   The snow covered trees and simply wearing my down jacket got me in the mood for not only for the upcoming holidays, but football and chili. I have fallen in love with this outstanding recipe (and book) from the True Food cookbook. The flavor is smoky and spicy, the perfect chili combination. Bison is an excellent source protein and iron and is actually leaner and with less cholesterol than beef. So eat up!


Ingredients:

6 Tablespoons Olive Oil
24 ounces ground Bison
salt and ground black pepper
1 large onion
1-2 jalapeno peppers, seeded and diced
4 garlic cloves
2 tablespoons ground cumin
2 tablespoons chili powder
2 tablespoons pure ancho chile powder
1 teaspoon red pepper flakes
2 cups canned diced tomatoes (San Marzano)
2 cans (15oz) white beans, rinsed and drained
1 cup Chicken Stock
2 (1-inch square) piece of dark chocolate
2 teaspoon dried oregano
1 teaspoon paprika
1/4 teaspoon cinnamon
2 teaspoon salt
1/2 chopped fresh oregano

** garnishings: greek yogurt, manchego or cheddar cheese, fresh cilantro, corn bread, whole wheat tortillas

In a large pot, heat the olive oil over medium high heat. Add the Bison, season with salt and pepper and stirring occasionally until the mean is browned.  Add onions and saute for two minutes. Add jalapenos and garlic, sauteing for another 2 minutes. Add cumin, chili powder, ancho chile powder, red pepper flakes, and mix well with bison.

Add the diced tomatoes, beans and chicken stock, bringing the mixture to a simmer. Reduce the heat to low. Let simmer for 30 minutes, stirring often.

Add the chocolate, oregano, paprika cinnamon and salt. Stir and let simmer for another 15 minutes. Ladle into bowls and serve with desired garnishes. If not serving immediately let the chili cool or freeze.


Saturday, November 23, 2013

cinnamon infused simple syrup for the brandy old fashioned


Winter in Wisco....What does it mean to you? Apparently to the citizens of this fine state, it means enjoying one of the tastiest cocktails known to man, the brandy old fashioned.

Wisconsin has the highest percentage of retail spending on brandy in the United States.

In 2012, California-based Korbel shipped about 324,000 nine-liter cases of brandy. Of those, about 141,000 - 43.5% of Korbel's production - went to Wisconsin.

These stats made me feel better about the fact that we are already on our second bottle of Korbel this month (FYI - We did have some people over - dan and I cannot take all of the credit),

An Old Fashioned is easy to make and you probably already have all of the ingredients that you need at home. There are many ways to enjoy this classic drink, but I like to use simple syrup vs. plain sugar when I mix mine. The syrup is super easy to make and it makes your house smell amazing in the process. I have been giving jars of it away as hostess gifts and party favors, and they have been well received :)

simple syrup (good on ice cream too!!)

Simple Syrup

4 cups sugar
4 cups water
8 cinnamon sticks


Add sugar, water and cinnamon to a medium saucepan. Bring mixture to a boil and reduce heat to low. Let the mixture simmer for 2 hours. Remove from heat and store in the refrigerator in a jar or airtight container. 


Brandy Old-Fashioned 

2 shots brandy
2 dashes Angostura bitters
1 Tbs of simple syrup
top with lemon lime soda (I use diet 7up)
garnish with a cinnamon stick and fruit (cherries, oranges etc)


CHEERS!!!