Wednesday, December 4, 2013

Cranberry Cookie Bars


Bring on the Cookies!!!
This recipe from the smitten kitchen cookbook  is super easy and the resulting bars taste more like a pie than a cookie. What could be better than a pie-cookie? NOTHING!
These pie-cookies are easy to cut, stack and wrap up for a hostess gift (like I did!!) and they look very festive - don't you think?!

Cranberry Crumb Bars with Mulling Spices (from the Smitten Kitchen Cookbook by Deb Perelman)
Recipe for the crumb:
16 tablespoons unsalted butter, chilled, plus more at room temperature for the pan
3 cups all-purpose flour
1 cup granulated sugar
1/2 teaspoon table salt
1 teaspoon baking powder
1/2 teaspoon ground cinnamon
1/4 teaspoon ground nutmeg
1/8 teaspoon ground cloves
1/8 teaspoon ground allspice
1 large egg

Recipe for the filling:
1/2 teaspoon freshly grated orange zest
1 1/2 tablespoons orange juice
3 cups fresh cranberries
1/2 cup sugar
1 tablespoon cornstarch

Preheat your oven to 375°F. Line the bottom of a 9×13-inch baking pan with parchment paper, and butter the sides and the parchment. In a large, widish bowl, whisk together the flour, sugar, salt, baking powder, and spices. With a pastry blender or fork, work the chilled butter and the egg into the flour mixture until the mixture resembles coarse meal. Pat half the crumb base into the bottom of your prepared pan; it will be thin.

In the bowl of a food processor or blender, briefly pulse the filling ingredients until the berries are coarsely chopped but not pureed. Spread the filling over the crumb base. Sprinkle the remaining crumbs evenly over the cranberry mixture.

Bake cookies for 30 to 35 minutes, or until lightly browned on top. Cool completely before cutting into squares.

Healthier Broccoli and Cheese Soup


Ug, I feel like a stuffed sausage. Seriously, someone help me. There are waaaay too many temptations this time of year and with the threat of bathing suit season at least 6 months away, my will-power is slim to none.
I do like eating healthy, but I do not like to sacrifice taste (or cocktail weenies). I decided to try this cooking light recipe, in the hopes that it would be satisfying, delicious and healthy, and..... my entire family loved it (obviously I cooled it down for the tots)!


Broccoli & Cheese Soup
Recipe - Cooking Light

Ingredients Cooking spray
1 cup chopped onion
2 garlic cloves, minced
3 cups fat-free, low-sodium chicken broth
1 (16-ounce) package broccoli florets
2 1/2 cups 2% reduced-fat milk
1/3 cup all-purpose flour
1/4 teaspoon black pepper
8 oz of Velveeta Light, cubed
3 oz sharp shredded cheddar


Preparation 
Heat a large nonstick saucepan coated with cooking spray over medium-high heat. Add onion and garlic; saute 3 minutes or until tender. Add broth and broccoli. Bring broccoli mixture to a boil over medium-high heat. Reduce heat to medium; cook 10 minutes.
Combine milk and flour, stirring with a whisk until well blended. Add milk mixture to broccoli mixture. Cook 5 minutes or until slightly thick, stirring constantly. Stir in pepper. Remove from heat; add cheese, stirring until cheese melts.
Place one-third of the soup in a blender or food processor (I used an immersion blender), and process until smooth. Return pureed soup mixture to pan.

Saturday, November 30, 2013

Bison Chili

Winter is here in Denver (at least for the past week) and the snow has actually stayed on the ground!  We woke up at the crack of dawn on Saturday to head up to the slopes for the first time, and surprisingly enough. there was very little traffic and the sky was crystal clear.   The snow covered trees and simply wearing my down jacket got me in the mood for not only for the upcoming holidays, but football and chili. I have fallen in love with this outstanding recipe (and book) from the True Food cookbook. The flavor is smoky and spicy, the perfect chili combination. Bison is an excellent source protein and iron and is actually leaner and with less cholesterol than beef. So eat up!


Ingredients:

6 Tablespoons Olive Oil
24 ounces ground Bison
salt and ground black pepper
1 large onion
1-2 jalapeno peppers, seeded and diced
4 garlic cloves
2 tablespoons ground cumin
2 tablespoons chili powder
2 tablespoons pure ancho chile powder
1 teaspoon red pepper flakes
2 cups canned diced tomatoes (San Marzano)
2 cans (15oz) white beans, rinsed and drained
1 cup Chicken Stock
2 (1-inch square) piece of dark chocolate
2 teaspoon dried oregano
1 teaspoon paprika
1/4 teaspoon cinnamon
2 teaspoon salt
1/2 chopped fresh oregano

** garnishings: greek yogurt, manchego or cheddar cheese, fresh cilantro, corn bread, whole wheat tortillas

In a large pot, heat the olive oil over medium high heat. Add the Bison, season with salt and pepper and stirring occasionally until the mean is browned.  Add onions and saute for two minutes. Add jalapenos and garlic, sauteing for another 2 minutes. Add cumin, chili powder, ancho chile powder, red pepper flakes, and mix well with bison.

Add the diced tomatoes, beans and chicken stock, bringing the mixture to a simmer. Reduce the heat to low. Let simmer for 30 minutes, stirring often.

Add the chocolate, oregano, paprika cinnamon and salt. Stir and let simmer for another 15 minutes. Ladle into bowls and serve with desired garnishes. If not serving immediately let the chili cool or freeze.


Wednesday, November 27, 2013

Spiced Nuts

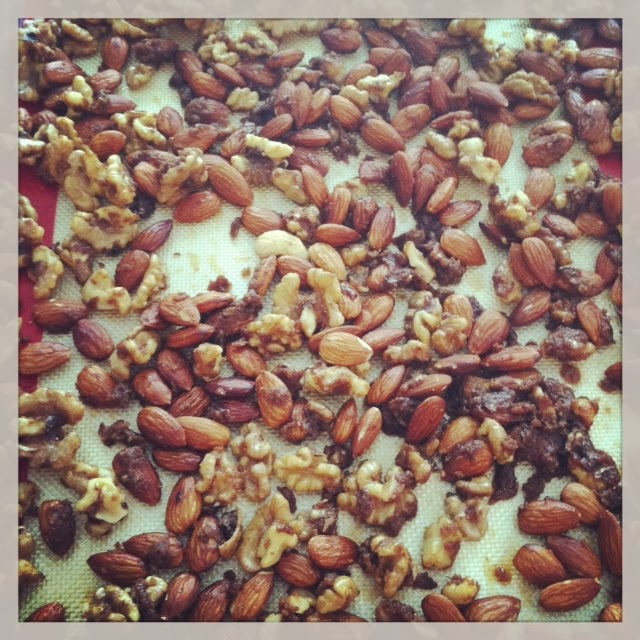
Nuts.....almost everyone loves them and they are sooo much better for you than the other holiday junk that I stuff my face with.  Emeril's candied, spicy nuts are amazing. I have made two batches in the last week - I throw them on salads, add them to trail mix and eat them by the handful (NOTE - if you eat nuts by the handful, they are no longer a super healthy snack).  They pack a bit of heat, so if you like spicy, give these a try for your next holiday gathering.

Recipe for Spiced Nuts - Emeril Lagasse

Ingredients
1/2 teaspoon ground cumin
1/2 teaspoon cayenne pepper
1/2 teaspoon ground cinnamon
4 cups unsalted mixed nuts, such as walnuts, pecans, hazelnuts, and almonds
4 tablespoons unsalted butter
6 tablespoons brown sugar
1 teaspoon salt
Mix spices and reserve.

Directions
Heat the nuts in a dry skillet and cook, stirring frequently, until they begin to toast, about 4 minutes. Add the butter and cook, stirring, until the nuts begin to darken, about 1 minute. Add the spices, the sugar, 1 tablespoon water, and the salt and cook, stirring, until the sauce thickens and the nuts are glazed, about 5 minutes.

Remove the nuts from the heat and transfer to a baking sheet lined with aluminum foil, separating them with a fork. Let the nuts stand until cooled and the sugar has hardened, about 10 minutes. Store in an airtight container.

Saturday, November 23, 2013

cinnamon infused simple syrup for the brandy old fashioned


Winter in Wisco....What does it mean to you? Apparently to the citizens of this fine state, it means enjoying one of the tastiest cocktails known to man, the brandy old fashioned.

Wisconsin has the highest percentage of retail spending on brandy in the United States.

In 2012, California-based Korbel shipped about 324,000 nine-liter cases of brandy. Of those, about 141,000 - 43.5% of Korbel's production - went to Wisconsin.

These stats made me feel better about the fact that we are already on our second bottle of Korbel this month (FYI - We did have some people over - dan and I cannot take all of the credit),

An Old Fashioned is easy to make and you probably already have all of the ingredients that you need at home. There are many ways to enjoy this classic drink, but I like to use simple syrup vs. plain sugar when I mix mine. The syrup is super easy to make and it makes your house smell amazing in the process. I have been giving jars of it away as hostess gifts and party favors, and they have been well received :)

simple syrup (good on ice cream too!!)

Simple Syrup

4 cups sugar
4 cups water
8 cinnamon sticks


Add sugar, water and cinnamon to a medium saucepan. Bring mixture to a boil and reduce heat to low. Let the mixture simmer for 2 hours. Remove from heat and store in the refrigerator in a jar or airtight container. 


Brandy Old-Fashioned 

2 shots brandy
2 dashes Angostura bitters
1 Tbs of simple syrup
top with lemon lime soda (I use diet 7up)
garnish with a cinnamon stick and fruit (cherries, oranges etc)


CHEERS!!!


Tuesday, November 19, 2013

Macaroni and Cheese with Butternut Squash


This recipe has been one of my favorites for years.   It is the perfect fall dish and it is comfort food that I do not feel too guilty about. The butternut squash is a creamy & flavorful addition to the classic recipe and I usually add a little extra cheese :).

I am not sure if it will happen to you, but for some reason this mac & cheese tends to "disappear" when I am at work all day.  I am pretty sure Tom does not know how to open the fridge (although it wouldn't surprise me!). Needless to say, you will go back for more and more until it is gone.

Ingredients:
1 medium butternut squash, peeled and cut into one inch cubes
1 cup low-sodium chicken stock
1 1/2 cups nonfat or low fat milk
Pinch of graded nutmeg
Pinch of cayenne pepper
3/4 teaspoon coarse salt
Freshly ground black pepper
1 lb elbow macaroni
4 ounces extra-sharp cheddar cheese, grated
4 ounces gouda cheese, grated
4 tablespoons Parmesan cheese, finely grated
2 tablespoons fine breadcrumbs
1 teaspoon olive oil
1/2 cup part-skim ricotta cheese


1. Preheat oven to 375 degrees.  Spray a 9 inch square baking dish and set aside. In a medium sauce pain, combine squash, milk and stock. Bring to a boil over medium-high heat. Reduce heat and simmer until squash is tender, about 20 minutes. Remove from heat. With an emerson blender or a wooden spoon, mash squash until only small pieces are left. Add nutmeg, cayenne pepper, salt and season with black pepper. 

2. Meanwhile in a large pot, bring water to a boil and cook pasta as directed. Drain and transfer to a large bowl; add squash mixture. Mix in ricotta, cheddar, gouda and two tablespoons of parmesan. 

3. Transfer noodle dish to your prepared pan. In a small bowl mix breadcrumbs, remaining parmesan and olive oil. Sprinkle mixture on top of dish. Cover with foil and bake for  20 minutes. Remove foil and bake for another 30-40 minutes, until the cheese is browned. Enjoy immediately. 


Tom, my kitchen floor cleaner/baking buddy

Tom LOVING fall! (and his long locks)

Friday, November 15, 2013

Deep Dish Apple Pie

This is the time of year that I usually start to "hunker down".  I become less social, I start wearing my very mom-ish wool clogs, and I spend 75% of my day in the kitchen, baking, eating and sipping (or gulping) old fashioneds. This holiday season is going to be different - well, sort of.  I will probably still do all of the above, but instead of resigning myself to a winter of isolation,  I am going to say "yes" to more invitations and try to have people over, even if it is just to drink coffee and whine about how cold it is.

This pie is perfect for any social gathering, a 10am coffee or with a night cap.  The deep dish crust allows you to pack almost double the amount of apples that you would put in a traditional pie.  It looks beautiful and it tastes amazing.

* I used 3lbs golden delicious and 2 lbs of jonagold apples

deep dish apple pie - recipe from the smitten kitchen cookbook


crust ingredients:
8 tablespoons (1 stick) salted butter, cold
1 1/4 cups all-purpose flour
1 teaspoon granulated sugar
1/4 cup ice water

filling ingredients:
5 lbs. apples (about 10-12 large apples)
1 tablespoon freshly squeezed lemon juice
1 cup granulated sugar
1/4 cup all-purpose flour
1/2 teaspoon salt
1/2 teaspoon ground cinnamon
1/4 teaspoon ground ginger
1/4 teaspoon ground cloves
1/4 teaspoon ground allspice
1/4 teaspoon freshly grated nutmeg


streusel ingredients:
3/4 cup granulated sugar
1 1/3 cups all-purpose flour
1 teaspoon baking powder
1/4 teaspoon salt
1/2 teaspoon ground cinnamon
8 tablespoons salted butter, melted

directions:
to make the crust: cut the cold butter into one-inch cubes. in a food processor, pulse the flour, sugar, and butter cubes together until the butter is incorporated into the flour. while running the food processor, slowly pour the cold water into the mixture. as soon as the mixture forms into a dough ball, stop the food processor. remove the dough from the food processor and form it into a ball. wrap the dough ball in plastic wrap and let the dough ball chill in the refrigerator for one hour. after one hour, roll out the dough out on a floured surface to fit a 9-inch springform pan with 3-inch sides. place the dough into the pan, pressing it against the sides and along the bottom of the pan. trim off any overhanging dough. let the dough chill in the refrigerator while you prepare the filling.

to make the filling: peel, core, and dice the apples into cubes, no more than 1/4 inch thick. (the small pieces will fit better edge to edge in the crust.) put the diced apples into a large bowl. sprinkle the lemon juice, sugar, flour, salt, and spices over the apples and toss well making sure that all of the apples are evenly coated. evenly distribute the apple mixture, along with it's juices, in the prepared pie crust. use a spatula to spread the apples as flat and evenly as possible in order to make sure that all of the apples fit into the crust. bake the pie for 30 minutes at 375 degrees F while you prepare the streusel.

to make the streusel: stir together the sugars, flour, baking powder, and spices in a bowl. pour in the melted butter and stir until large clumps form. set the streusel aside until ready to use.

after the pie has baked for 30 minutes at 375 degrees F, remove the pie from the oven. sprinkle the streusel over the top of the pie, pressing it into the apples. reduce the oven temperature to 325 degrees F and bake the pie for another 60 minutes. once baked, allow the pie to sit at room temperature to cool completely. (the pie will slice cleanly after sitting in the refrigerator for a while*.) remove the outside of the springform ring and slide the pie out to slice and serve.

* I baked my pie the night before put it in the refrigerator and pulled it out the next morning.  I served it at room temp and it looked and tasted great!


Don't you love my vintage pie tin that I scored at St. Vincents?!